Top Glass Tiles Purchase Price + Quality Test
More people than ever before choose or buy glass tile accents for their homes when they want a modern, fashionable appearance, but they do not think about the problems
Glass tile adds a dash of style
It blends well with historic, transitional, or modern architecture
Ceramic tile dominated the market for years, with glass tile only utilized as accent and trim pieces
Installation materials, typically the same as those for the ceramic tile, received little attention
Glass tile is now employed as field tile in sizes 12″ by 12″ or greater, pushing the boundaries of traditional accent pieces in modern design trends
However, these new tiles also present new obstacles
Since glass may be the only material used in an installation, it’s critical to pick a bonding mortar that adheres to the specific requirements of glass
When installing opaque ceramic tile, the color of the thin-set mortar was typically not a problem
However, clear and translucent glass allows the mortar to be seen through the tile; if the color of the mortar varies, it will also do so in the glass tile
Choose a glass tile mortar with a bright white tone managed to a constant standard color to eliminate differences across a glass tile installation
Even in big installations that need numerous batches of mortar, the color constancy will guarantee a uniform appearance on the face of the glass tile
In addition, the mortar’s brilliant white hue can improve the appearance of glass tiles that are clear or translucent
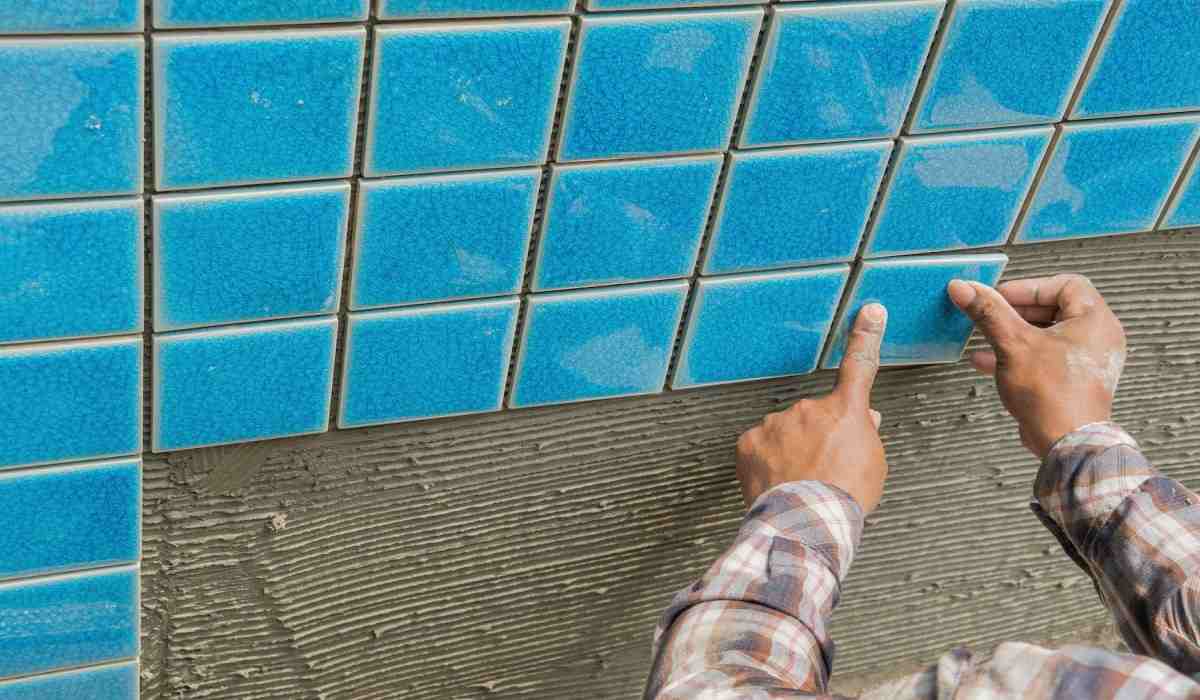
A thin-set mortar must first be applied to the surface with a notched trowel to install ceramic tile
Then the ceramic tile must be pressed into the mortar to collapse any ridges and improve contact with the mortar
Unfortunately, doing so may leave a lot of spaces in the cement holding the tile in place
The randomly distributed air pockets or spaces might be noticeable through clear or translucent glass, although this wouldn’t be a problem with opaque ceramic tile
The mortar must still be applied to the substrate using a notched trowel, but it must also be back-buttered (applied evenly and thinly to the back of the glass tile)
Since the back of the tile is already covered when the two mortared surfaces are forced together, any remaining gaps from the mortar ridges are hidden and do not show through the glass tile
Make sure the mortar resists shrinkage as well
Regular thin-set mortars tend to shrink and pull away from the tile, creating voids and air bubbles during the curing process
The setting materials must have a solid bond because the surface of the glass is so smooth
High bond strength materials with a high polymer content ensure that the glass stays in its place throughout the installation
Small, artisan glass tile manufacturers may not produce their products to industry standards due to surface treatments or tile backings, which is another installation difficulty
Metallic and painted backings may come free because they may not adhere to cement-based mortars well
Like a mesh backing, water trapped beneath the tile might deteriorate the bond or lead to mold growth
Before beginning the project on a larger scale, construct a mock-up to test the tile installation materials
There are times when glass tile installations fall apart as a result of exposure to heat sources like the sun
Glass tile expands and absorbs heat at different rates from cement setting ingredients, which can cause fissures in the completed surface
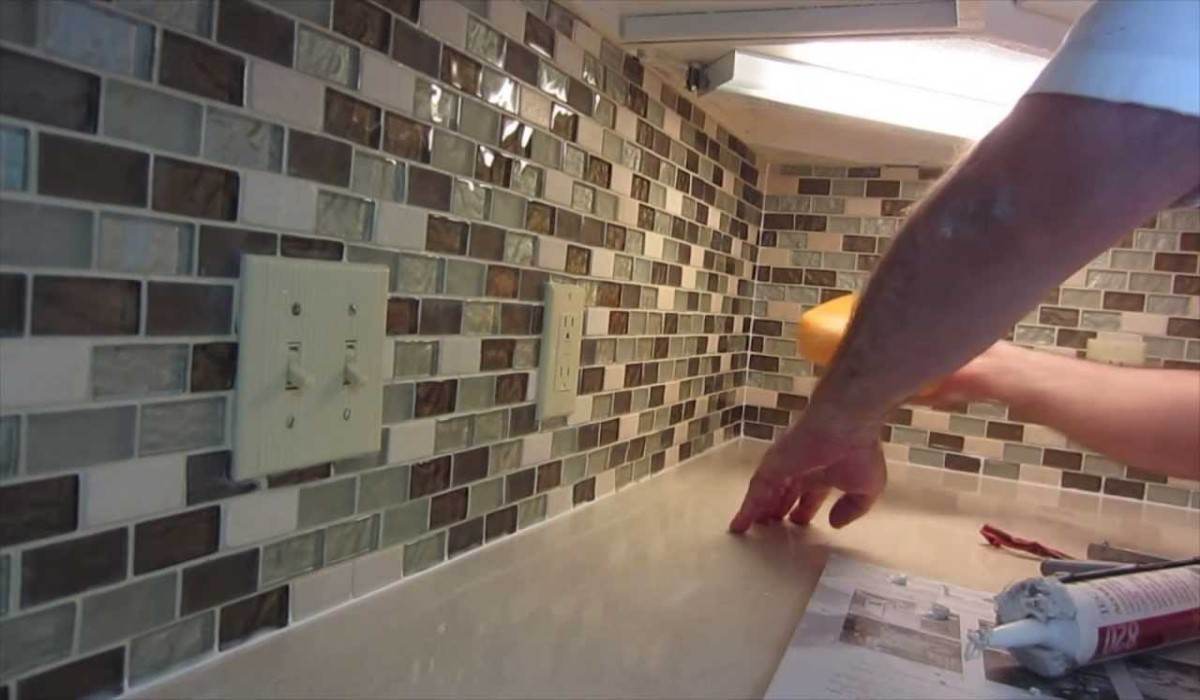
Again, the polymers in the mortar will aid in absorbing some movement; nevertheless, movement joints that can withstand the bending tiles should also be made using silicone caulk
Buy Glass Tile Installation Steps
If you have or have to buy the necessary tools and adhere to some simple installation steps and guidelines, installing glass tile is not difficult
The fundamentals of installing glass tiles are covered here
Note: Always adhere to any local or state building codes and any special directions provided by the glass manufacturer
Remove the tiles from the box and inspect them
This enables you to verify their color accuracy and that the tiles are in good condition and ready for usage
Create a mock-up of the project to see how it will appear
If you are a contractor working on a project for a client, this is crucial
Ensure that glass tiles are blended and cleaned
Take a sheet from each box, compare the colors, and then combine them to see if there are any differences
Before setting, clean the glass tiles
Ammonia can be used to clean glass
However, isopropyl alcohol will help you to clean it more effectively by opening the pores in the glass
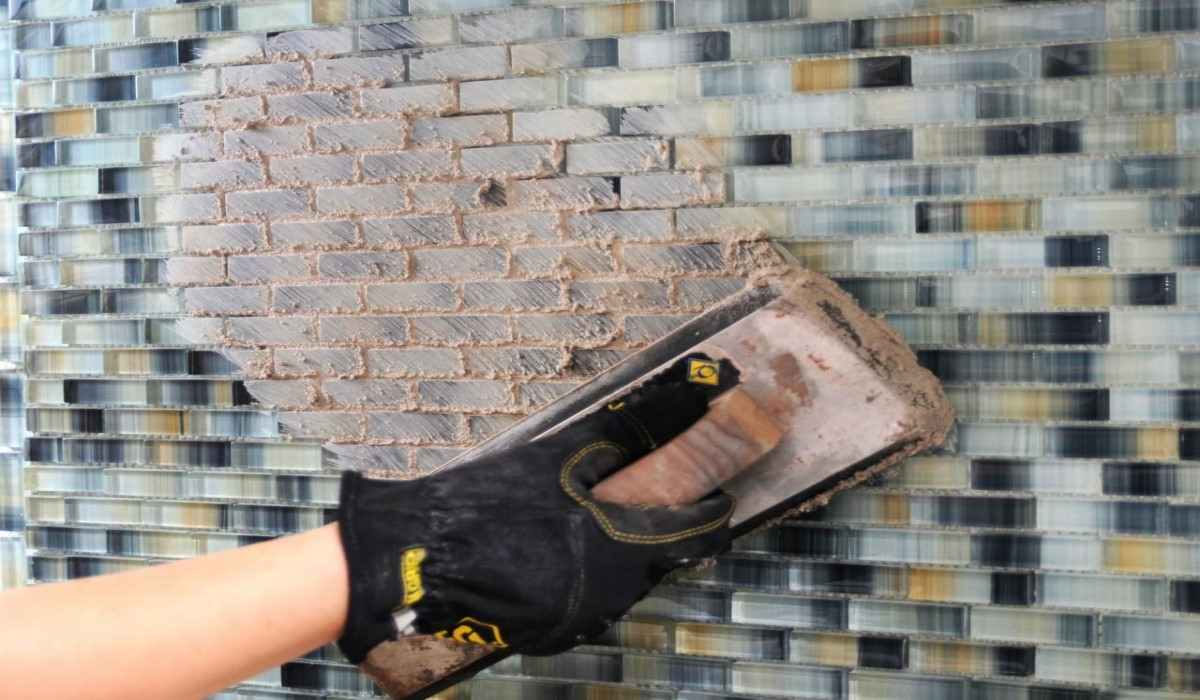
Always key in your thinset by using the flat side of the trowel to deposit a coat of mortar into the substrate for a strong bond
Gradually add more mortar to the substrate, applying it with caution in a single direction in straight lines
The most efficient mortar distribution is ensured by applying the trowel ridges in straight lines
Before setting, dab a little thinset into divots
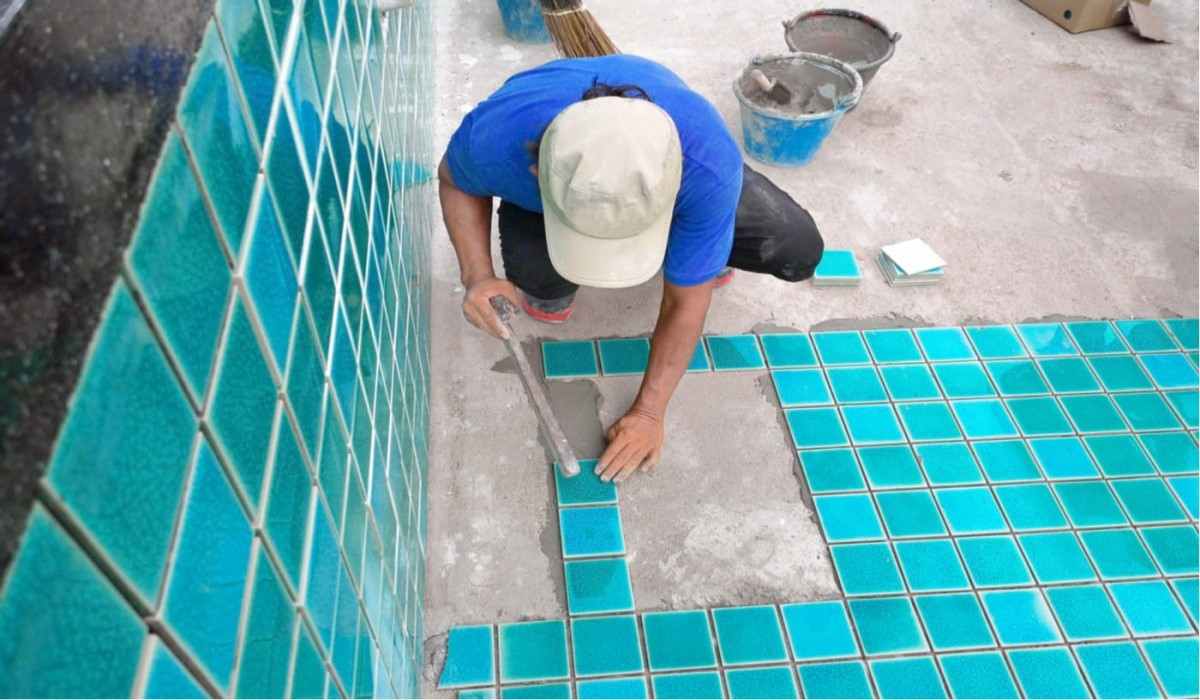
Lay your tile out evenly, then tap the seams and lines into place with a regular float
To reduce sheet lines, offset your sheets
It takes patience to pull the paper
Start by lightly moistening it, being careful not to overdo it
Your wait time will depend on the environment; however, pull the paper while the thinset is still malleable and usable
Wet the paper with a damp sponge
With one hand pressing down on the tile and the paper being pulled off at a 45-degree angle, the paper can be removed
Keep in mind that various mounting solutions call for various techniques
The paper face must be pulled from the mesh back, which can be seen as a set
It’s time to make set modifications
You can still make modifications and edits because the thinset is still malleable and workable
Litokol grout and tile installation solutions are distributed only in the United States by The Tile Doctor
Since Litokol products are non-toxic and non-corrosive, installers can use them without risk
The exceptional quality and convenience of use of Litokol grout products are well known across the world
Star-shaped grout can be used as an adhesive or as grout
To install glass tiles with Starlike grout, follow these steps: Mix your Starlike grout in step:
A two-part anti-acid epoxy mortar is what Starlike grout is
Epoxy resin, inert ceramic quartz, and mud additives make up Part A
Part B is made up of a combination of organic catalysts with negligible negative environmental effects and lower user exposure risks
Lay the grout out and cover it
One step is possible when using Starlike grout
Since Starlike functions as both an adhesive and a grout, two installers can work side by side, one bedding and spreading while the other follows immediately after to complete the grouting
This can cut down on application time and remove concerns about the squeeze
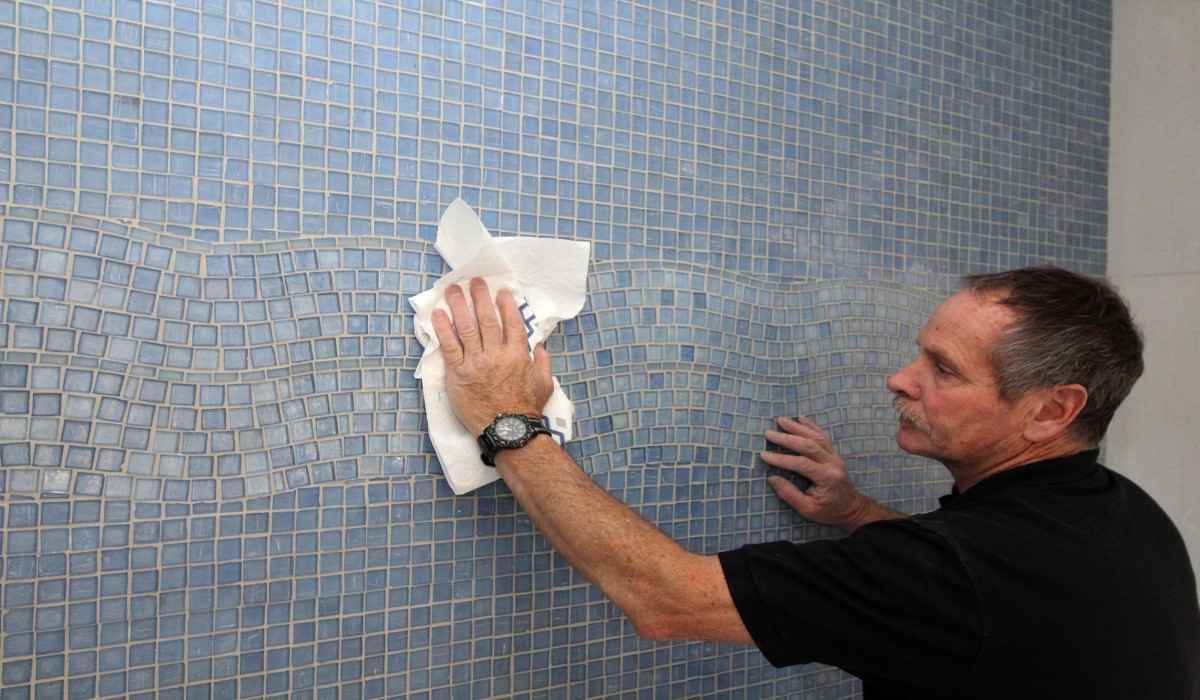
Use water and a Tile Doctor scrub pad
Although enough water is used, the surface doesn’t need to be flooded
Scrub pads with color can remove the color from your fabric
As you go over the tiles, use a spray bottle to keep plenty of water on their surface
You can notice the formation of the white emulsion by wiping in a circular motion
The resin is being scraped from the surface in this manner
This is easily removed with a sponge in a single or double pass
Dish soap and water can be used to eliminate further haze
Buy Glass Tile Problems
Even though they may be flawless, pristine, and stunning, drilling into and anchoring them raises serious safety concerns
Weight-bearing is not intended for glass tiles
They’ll break
Almost every time we attempt to anchor a door to a wall, it occurs
When we drill into them, they have the potential to crack, but most likely not at this time
When we place our anchors in the hole, they may crack because the pressure expands and damages the tile
Alternatively, they can break when we drive the screws into the anchors, putting greater strain on the holes
If by some miracle they haven’t already broken, they will undoubtedly do so once the heavy glass door is set and we begin to swing it open and shut
We can cut glass because people believe we are experts in the field
That’s accurate
However, we haven’t discovered the enchanted glass dust that would keep glass tile walls from crumbling
The nature of thin, untempered glass tiles makes them incapable of supporting weight in a nutshell
Here are some solutions to this problem when it comes to installing a shower door if you want to use glass tiles in your shower enclosure: Imagine a glass tile accent wall
Typically, this wall would be in the back, away from the shower door
While the remainder of the shower is made entirely of glass tile, the decorative border around the glass might be made of another material

We can create shower doors in some cases where the door is hinged off the fixed panel, and the fixed panel is anchored to the ceiling and curb (not the glass)
If the area permits, there are inventive solutions to solve problems
There is still something we can do if the enclosure has already been tiled and we are out of options
The shower may be installed, and we can check to see what cracks and doesn’t
We will be up forward and ask you to sign a release saying we are not responsible for cracked glass tiles
Sometimes the fissures are hardly perceptible and extend to a grout line near the anchor point
You may put up with this
If not (quite understandable), we will provide the locations of all the hardware and anchor points
The tile setter then returns to break out the tiles and create a sturdy anchor patch so that we can mount our hardware once we remove the glass
After that, we return and reinstall
Though expensive and painful, this is conceivable


