Brick has long been a symbol of classic charm and durability in architecture and design. Its rustic appeal and timeless aesthetic have made it a popular choice for both interior and exterior applications. With advancements in technology and materials, the traditional brick has been transformed into a versatile and stylish option – glazed brick tiles. In this comprehensive guide, we will explore the beauty, benefits, and versatility of glazed brick tiles, and why they are the perfect choice for your next design project. ### What Are Glazed Brick Tiles? Glazed brick tiles are ceramic or clay tiles that have been coated with a layer of glaze, which is a glossy finish made from glass particles.
.
 This glazing process enhances the appearance and durability of the tiles, making them more resistant to stains, scratches, and water damage. The glazing also adds a beautiful sheen to the tiles, giving them a vibrant and lustrous finish. ### The Benefits of Glazed Brick Tiles 1. **Durability:** Glazed brick tiles are highly durable and long-lasting, making them ideal for high-traffic areas such as kitchens, bathrooms, and entryways. The glaze helps protect the tiles from wear and tear, ensuring they maintain their beauty for years to come. 2. **Easy Maintenance:** The smooth surface of glazed brick tiles makes them easy to clean and maintain. Simply wipe them down with a damp cloth or mop to keep them looking as good as new. 3. **Water Resistance:** The glaze coating makes glazed brick tiles water-resistant, making them a perfect choice for areas that are exposed to moisture, such as bathrooms and kitchens. This water resistance also makes the tiles less prone to mold and mildew growth. 4. **Versatility:** Glazed brick tiles come in a wide range of colors, sizes, and finishes, allowing you to create a customized look that complements your design aesthetic. Whether you prefer a sleek modern style or a more traditional look, there is a glazed brick tile option to suit your needs. 5. **Heat Resistance:** Glazed brick tiles are heat-resistant, making them an excellent choice for fireplaces, backsplashes, and other areas that are exposed to heat. They will not warp or discolor from exposure to high temperatures.
..
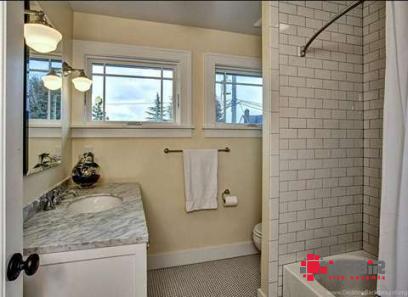
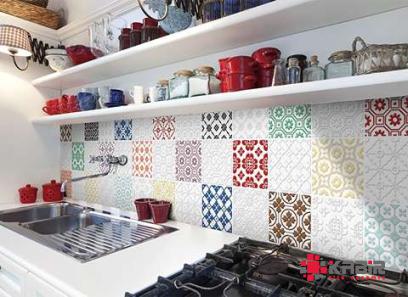
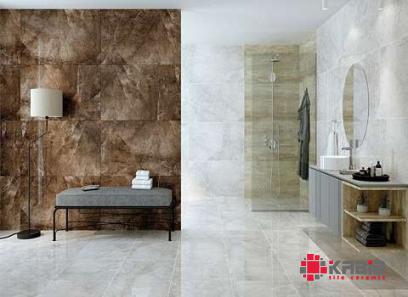 6. **Environmentally Friendly:** Many glazed brick tiles are made from natural materials such as clay, making them an environmentally friendly choice for your design project. They are also recyclable, reducing their impact on the environment. ### Where to Use Glazed Brick Tiles 1. **Kitchen Backsplash:** Glazed brick tiles add a touch of elegance and charm to any kitchen backsplash. Their durability and easy maintenance make them a practical choice for this high-traffic area. 2. **Bathroom Walls:** Create a spa-like oasis in your bathroom with glazed brick tiles on the walls. The water-resistant properties of the tiles make them perfect for shower and bathtub surrounds. 3. **Fireplace Surround:** Add warmth and style to your living room or bedroom with a glazed brick tile fireplace surround. The heat-resistant properties of the tiles make them a safe and practical choice for this application. 4. **Accent Walls:** Make a statement in any room with an accent wall covered in glazed brick tiles. Whether you prefer a bold pop of color or a more subtle texture, glazed brick tiles are a versatile option for creating a focal point in your space.
…
 5. **Outdoor Spaces:** Bring the beauty of glazed brick tiles to your outdoor living areas, such as patios, walkways, and outdoor kitchens. The durability and weather-resistant properties of the tiles make them a great choice for these high-traffic areas. ### How to Install Glazed Brick Tiles Installing glazed brick tiles is a straightforward process that can be done by both DIY enthusiasts and professional installers. Here are the basic steps involved in installing glazed brick tiles: 1. **Prepare the Surface:** Make sure the surface where the tiles will be installed is clean, dry, and free of any debris. If needed, apply a primer or waterproofing membrane to the surface to ensure proper adhesion. 2. **Layout the Tiles:** Plan the layout of the tiles to ensure they fit properly and create a visually appealing pattern. Use spacers to maintain consistent grout lines between the tiles. 3. **Apply Adhesive:** Apply a thin layer of tile adhesive to the surface using a trowel. Press the tiles into the adhesive, making sure they are level and properly spaced. 4. **Grout the Tiles:** Once the adhesive has dried, fill in the gaps between the tiles with grout. Use a grout float to push the grout into the spaces and remove any excess grout from the surface of the tiles. 5. **Seal the Tiles:** After the grout has dried, seal the tiles with a sealant to protect them from stains and water damage. Follow the manufacturer’s instructions for the best results. 6. **Finishing Touches:** Add any finishing touches, such as trim pieces or caulk, to complete the installation and give the tiles a polished look.


Your comment submitted.