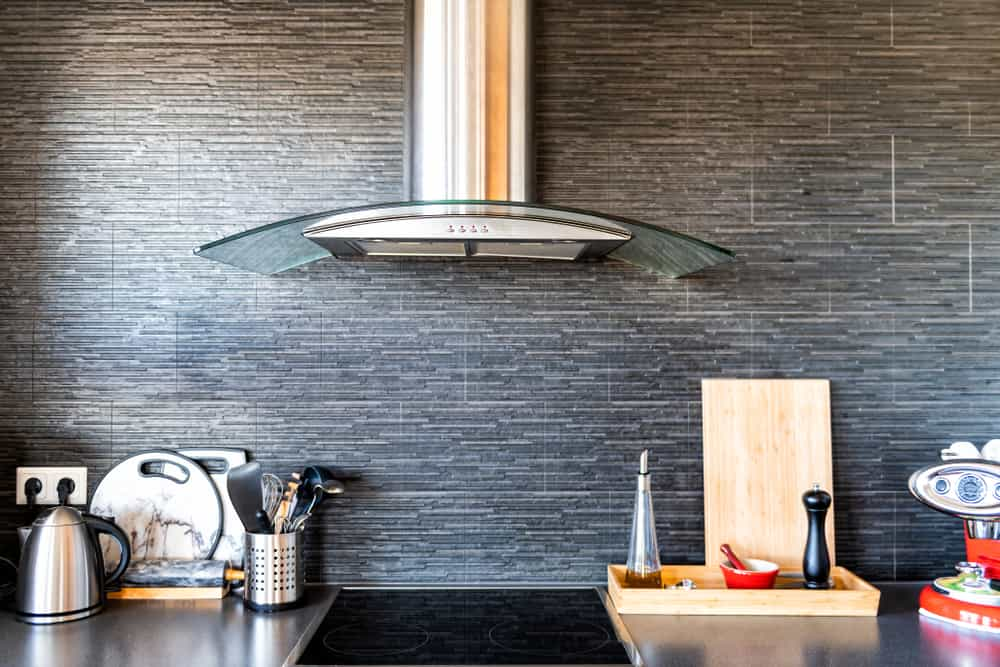
one of the places which need an installation guide is the kitchen backsplash. Porcelain tiles are best suited for these panels.
So people around the world such as edinburgh. The wall space above the bathroom or kitchen counter is the prime area for various spills – water, soap, dirt, grease, Aunt Joey’s tomato sauce, and even flames.
Protect your home with a durable back baffle (a material that covers the wall space), and it’s also a solution that uses the area as its primary decorative opportunity. We’ve put together this complete rear baffle guide to highlight the best rear baffle material that provides durability and style.
Advantages of the kitchen backsplash
The design of the kitchen or the bathroom has provided the owner with many interesting design options. One of these options is to install the panel, either during the newly built or rebuilt period or as a quick update to the existing decoration.
The rear spoiler can cause a feeling of color, shape, size, texture, installation mode, or especially factors! You may think that the impact of such a style is time-consuming or costly (or both).
Because the rear baffle is often a small area (not full floors and walls), it’s usually the items that DIY people can afford (rather than full floor and walls) that DIY people can finish the weekend. Although it is a relatively small undertaking, the baffle after the addition will impact the design and bring valuable benefits. The most important advantage of the rear baffle is not only in style but also in functionality.
The area behind the kitchen or bathroom counter should be able to withstand moisture (which can cause mold growth), stains, high temperature, and daily activities (which can damage appearance), all of which will destroy the unexplained wall surface. The back baffle can protect your walls and ensure that your space will remain strong and stylish for years to come.
When considering panel material, the homeowner’s primary focus is that it must withstand the elements that may be exposed every day.
For the health and safety of your family, the materials you choose should be moisture and flame resistant. Also, your rear spoiler should be low, as the rear baffle is an area that can get messy and needs regular cleaning (think stew sauce in the kitchen or makeup stains in the bathroom).
Choosing a cabinet, floor, paint, fixture and electrical materials can seem overwhelming. The rear baffle can be coordinated with your existing elements, or you can use the rear baffle as an opportunity for popular colors or patterns. The most important thing is to choose a variety of back baffle materials – a back baffle material that gives you a variety of choices so you can find the perfect back baffle design for your kitchen or bathroom.
In order to meet the basic requirements of kitchen or bathroom panels, tiles are a natural choice. No other material can compare with the advantages of tiles.
Humidity
Properly installed tiles are waterproof and can provide wall protection to prevent bruises from splashing and boiling liquid and steaming condensation onto the stove. Although other products may claim impermeable, non-meceral surfaces generally lack methods to prevent residual moisture from being hidden beneath the surface. Water that is not detected behind the material (and without the opportunity to dry out) can produce a dark, damp environment, which is where mold picks up.
Fire retardant
The baffle behind the kitchen is usually around the stove or oven, which means exposure to flame is possible. Tiles do not smoke, burn, melt or release toxic smoke when in contact with flames. Although some plastics melt when heated, tiles are non-combustible and can reduce flame spread.
Low maintenance
Tiles have the following low maintenance benefits:
Bacterial resistance: tiles resist the growth of bacteria and other microorganisms such as mold and have antibacterial options that inhibit or even destroy harmful microorganisms such as bacteria, molds, fungi, and viruses.
Resistant to stains: splashes and spills are found on your backrest, and you can be assured that they will not stain your tiles.
Striking resistant: daily activities in the kitchen and bathroom often involve small household appliances, pans, and utensils that can damage unprotected surfaces. The tiles are resistant to scratches, bumps, and cuts.
Easy to clean: When a disorder occurs, the tiles can often be cleaned by simply wiping them with water – no aggressive chemicals around the food you eat!
Several style options
With unlimited design options, tiles allow you to personalize a unique look to reflect your personal style.
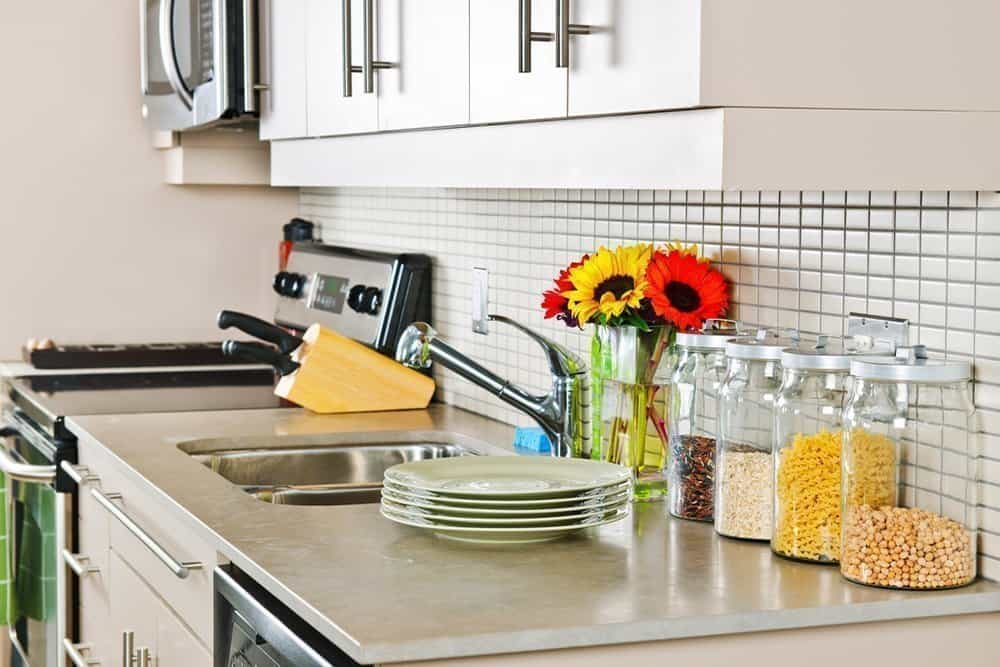
Because the tiles have the capacity to be installed as a backsplash and can be installed on all the surfaces of your kitchen and your bathroom – walls, counters, floors, showers, and even ceilings – you can use the tile option “House” to coordinate your exterior. Choose a coherent style or combine different designs that contrast and complement each other. Small mosaic tiles are perfect for small surfaces, like backsplashes.
The mosaics of tiles are known as creative combinations of shapes, colors, and textures. New manufacturing techniques allow more imaginative combinations. Manufacturers can install small mosaic tiles on strips or trellis to simplify the installation process.
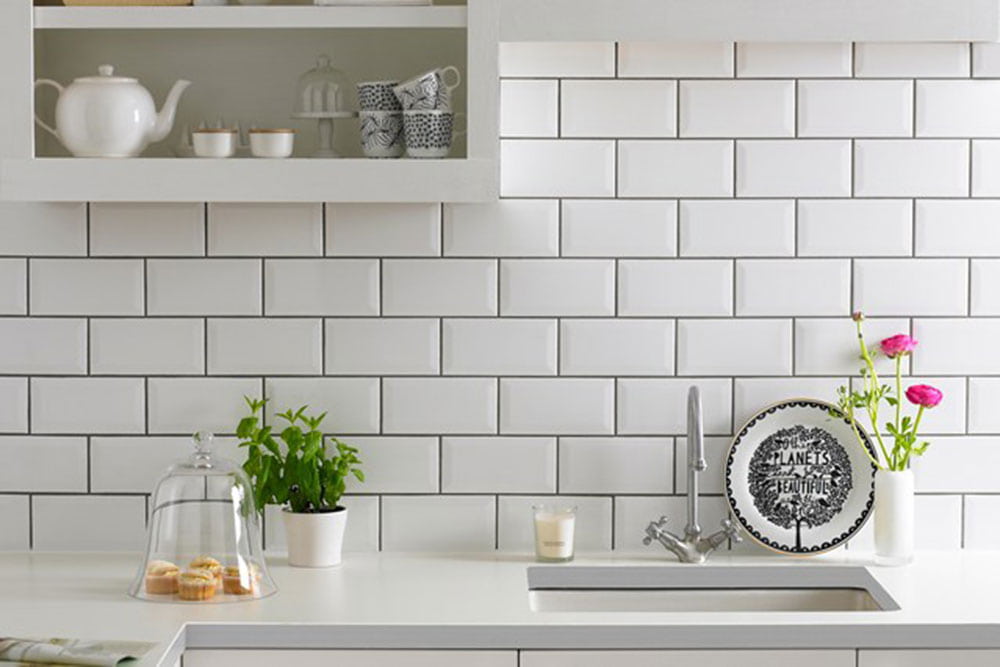
Metro tiles back
Venerated for their classic look and their clean lines, the Subway tiles are suitable for a variety of decoration styles, from the ultra-modern farm. Traditional white metro tiles have inspired a new generation of metro looks available in a variety of colors, sizes, and dimensional shapes.
Patterned tiles
The backsplashes can provide an ideal space to present patterned tiles, especially if you want the backrest to be the central point of the room, or when you could avoid patterns in large spaces. Tile patterns can also be created thanks to layout installations by deliberately repeating tile combinations or by selecting them at random to create unique conceptions.
Hexagonal tiles back
Hexagon has a retro heritage that continues to transcend time and evolve over time. The hexagons bring a playful texture in the honeycomb to your kitchen or bathroom backrest, while creating a look organized in a satisfactory manner. For a unique touch, consider daring contrasting colors or an offbeat design (read the rest to find out more about offset designs).
Herringbone tile backsplash
The herringbone pattern adds visual interest to tile installation and can look quite different depending on the size and color of the tile used. Choose from monochromatic tile colors and colorful grouts to showcase the pattern itself or color blends to create dazzling designs.
Installation guide for kitchen backsplash
An installation guide is a helpful tool while you are using kitchen backsplash for customers who want to do it themselves.
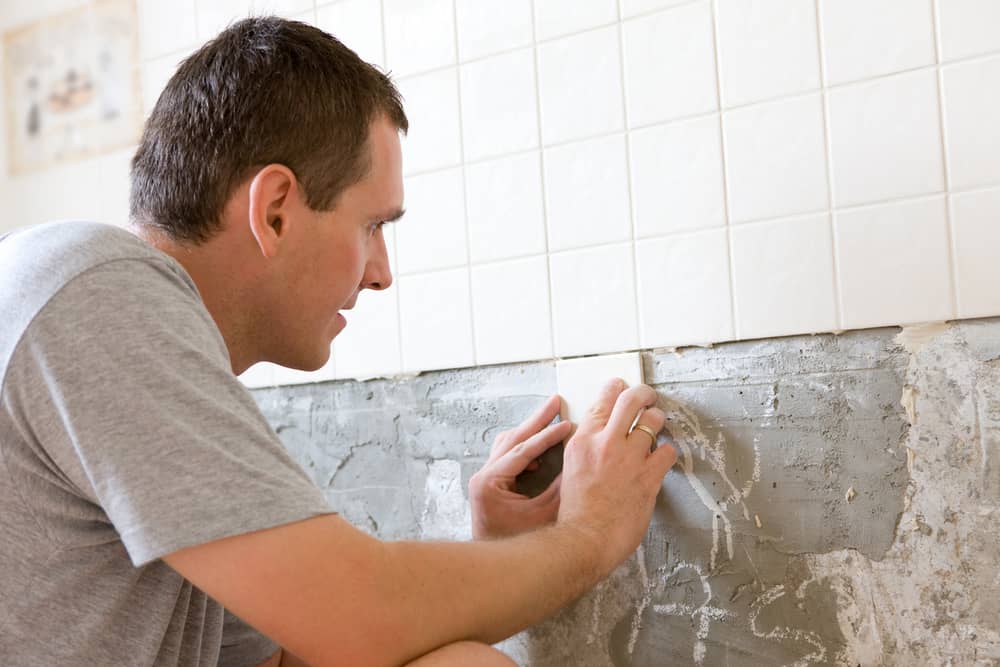
On a weekend, make your kitchen look like a spine that you made by yourself. With our brief explanation, you will learn to use ceramics or burial tiles to place tiles. After installing the DIY, the deflector is not only a way to extend the style of the kitchen. If you lift the mixture of dough early, you will know that the easy -to -clean rear deflector is also significant.
In addition, it is a fast -house decoration project. The beauty and the practical appearance of the new panel of tiles can become a single weekend in our step by step guide. We will show you how to cut, install and pour ceramic tiles to make fresh kitchen trim.
Step 1: Clean walls
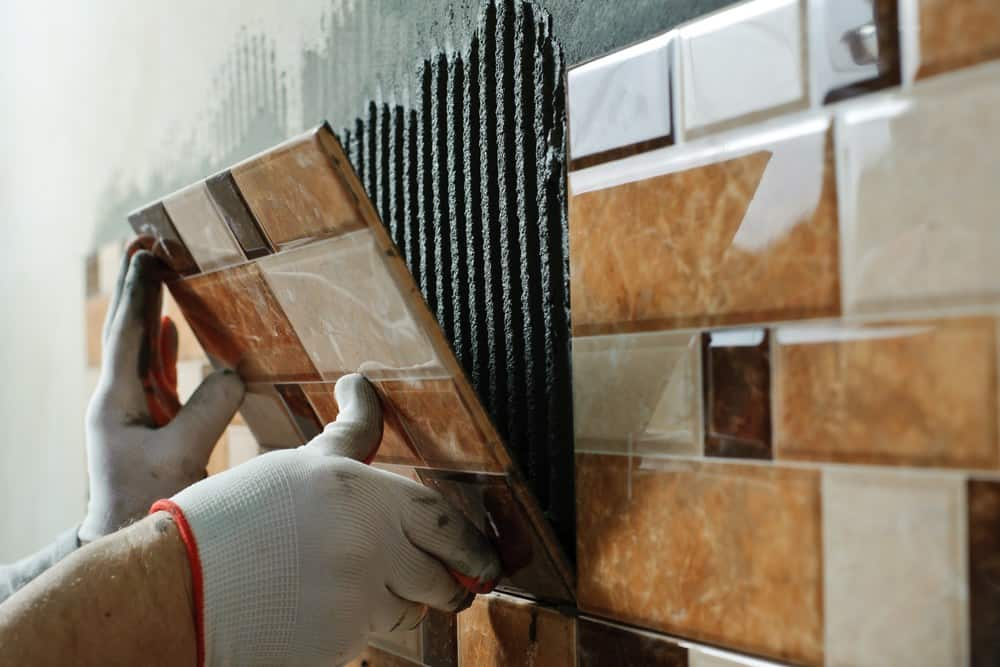
First, turn off the power of the kitchen, then remove any switch or output cover. The tiles can be applied to gypsum planks, but they must remove any loose wallpaper or paint. Use any defective wall, then wipe the dust with a good grip. Use sodium phosphate (TSP) to remove stains or hard oil residues. In the end, clean the wall with a damp cloth, then dry them completely, then put the back ball.
Step 2: Plan the layout of the tiles
Once the wall is cleaned, the adhesive tape and the paper ribbon are linked to checking your layout. As required, use a practical knife to cut the ceramic tile board and cut the rear grid. Find out how to manage any gap between the tile and the bottom of the wardrobe.
Targeting as close as possible to the half carriers. You can start the tile along the table without the need for joint lines, or you can leave the joint line to help reduce the difference above. The rape paper has reached the corner and once again tried to reach the gap between no more than half of the tiles. When you remove the pencil, mark the location of the leaves with a pencil.
Optional: Install the Schliter strip to create the edge of the tile
If you intend to use the Schliter to end the parade, measure, cut, and install strips before the flat store, then integrate them into the arrangement. Just add thin mortar to stop using the rear chicane band you want. You can also choose to use bull tiles to put an end to the deflector, which provides a circular edge treatment. Once the end of the rear chicane is reached, the bull’s head tiles will not be installed at the start.
Step 3: Apply thin parameters
Keep a piece of title at the table to protect the surface. By the mortar thin on the wall and repair it carefully with a concave presence to make the ridge smooth and even the crest. Check if the manufacturer’s specifications are applicable to recommended arrow grooves (1/8 inch very common).
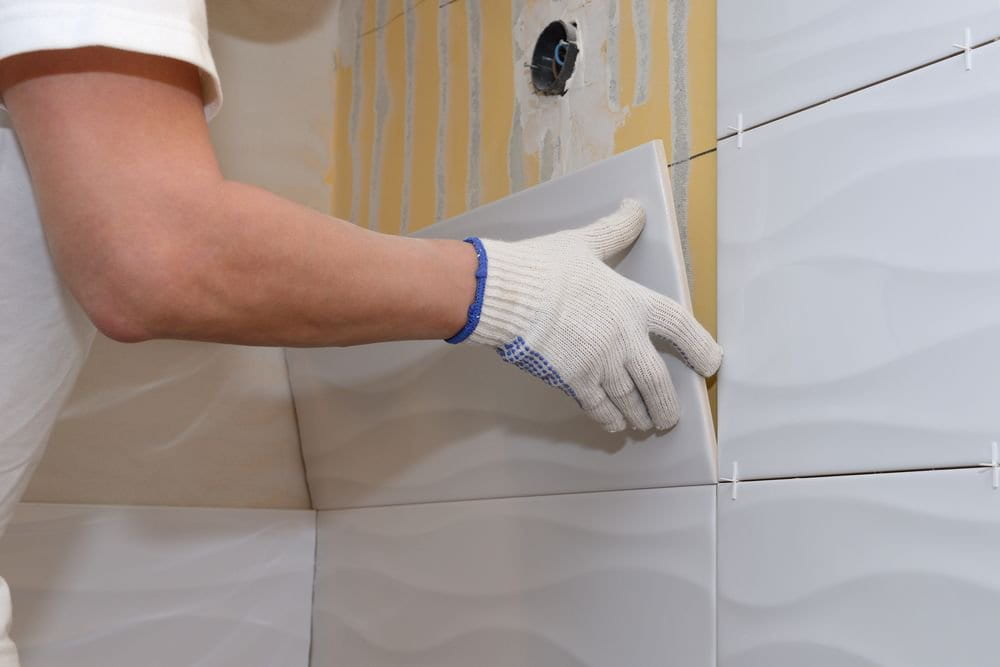
Step 4: After installing tiles
First, install the entire tile card and use your reference brand to align a column (you can see them through thin mortar). Use tiles to maintain the connection between the coherent card. After the application, remove the sheets to check the gap. Use more thin mortar if necessary.
Step 5: Install the tiles around the switch and the socket
When installing tiles, you can meet at least one socket or a switch. To make sure you deactivate the power supply to the circuit breaker panel, then unlock the two screws from the fixed switch or the socket, then gently remove it from the wall. After paving and joint, add an extension. Due to the thickness of the tiles, you may need longer screws.
Step 6: Continue to add tile pads
Use the pads through the rear deflector to allow the length and width of your tile along the wall. Without padding, your tiles are likely to fold. Remember that your wall may not be completely square. To this end, you may need to cut a few tiles to appropriate or compensate for the largest line of joints under the cabinet.
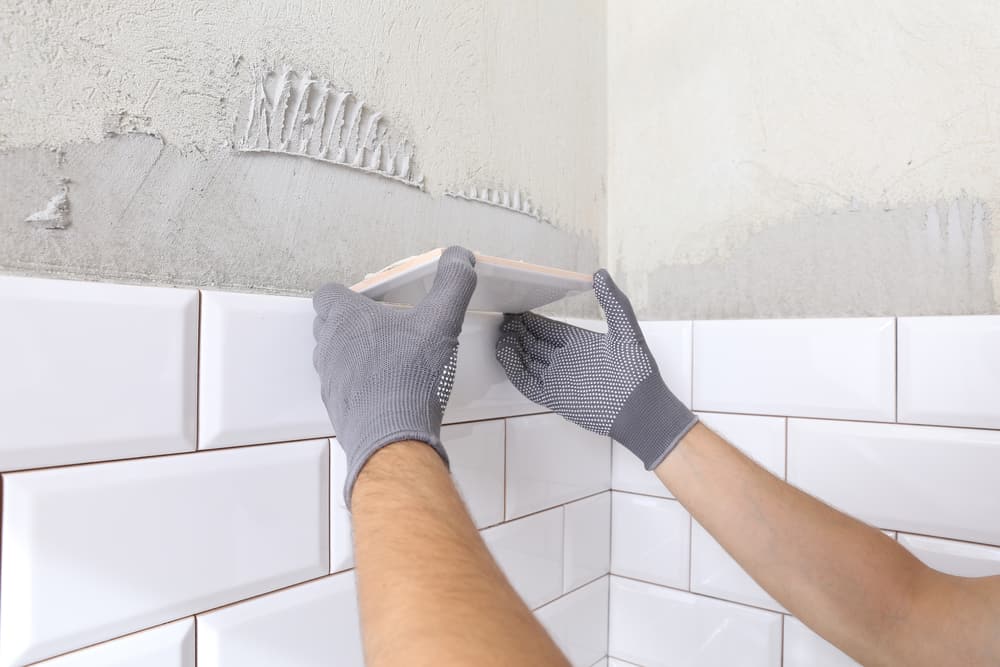
Step 7: Install the last line of tiles
After you arrive at the Schluter, cut the tiles and install them with a saw or a cutting machine. If necessary, use the friction to smooth all unequal edges.
Step 8: Configure Tiles
When all the tiles are in place, use your fingers or clean grout to press them firmly to the wall. Check if all the tiles are well defined. Wipe off any additional thin mortar.
Step 9: Apply Tile Grout
Allow the thin mortar to solidify (usually 12 hours), then mix. By moving the tile drift vertically, horizontally, and diagonally, the grouting is transformed in every seam. Use grouting all gaps between tiles. There should be no holes, gaps, or bubbles.
Step 10: Wipe with a sponge
After you finish grouting the ball of the tile, wipe it down several times with a damp (not wet) sponge to remove excess grout on the tile.
Step 11: Wipe with a dry towel
Once the maker is dried according to the manufacturer’s instructions, use a clean dry cloth to remove any haze on the tile.
Step 12: Seal Tile Grout
In order to facilitate maintenance on the road, the garden sealant is used. This will reduce the possibility of staining. Fill in the area where the rear baffle connects to the upper cabinet to complete the installation of the rear tile baffle.


Your comment submitted.