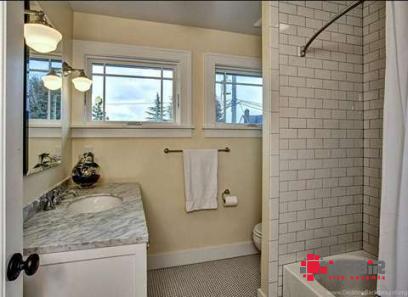
When it comes to designing a bathroom, one of the most important aspects to consider is the flooring. A bathroom floor not only needs to be practical and durable but also aesthetically pleasing. Among the various flooring options available, ceramic tiles are a popular choice for bathrooms due to their versatility, durability, and low maintenance. In this comprehensive guide, we will dive deep into the world of bathroom floor ceramic tiles, exploring their benefits, types, installation, maintenance, and much more.

.
 Benefits of Bathroom Floor Ceramic Tile: Ceramic tiles offer a myriad of benefits that make them an excellent choice for bathroom flooring. Firstly, ceramic tiles are known for their durability and long-lasting performance. They are resistant to moisture, stains, and scratches, making them ideal for wet environments like bathrooms. Additionally, ceramic tiles are easy to clean and maintain, requiring only regular sweeping and occasional mopping to keep them looking fresh. Another advantage of ceramic tiles is their versatility in design. They come in a wide range of colors, patterns, and textures, allowing homeowners to create a custom look that suits their style preferences. Whether you prefer a sleek modern aesthetic or a classic traditional vibe, there is a ceramic tile option to match your vision. Furthermore, ceramic tiles can mimic the look of natural stone or wood at a fraction of the cost, making them a cost-effective choice for bathroom flooring.
..
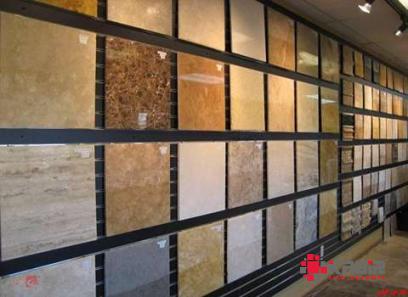
 Types of Bathroom Floor Ceramic Tile: When it comes to ceramic tiles for bathroom floors, there are several options to choose from based on your preferences and requirements. The most common types of ceramic tiles used in bathrooms include: 1. Porcelain Tiles: Porcelain tiles are a type of ceramic tile that is known for its high durability and water resistance. They are dense, non-porous, and perfect for high-moisture areas like bathrooms. Porcelain tiles come in a variety of finishes, including matte, glossy, and textured, offering endless design possibilities. 2. Glazed Ceramic Tiles: Glazed ceramic tiles have a protective layer of liquid glass that is applied to the surface before firing. This glaze makes the tiles resistant to water, stains, and scratches, making them an excellent choice for bathroom floors. Glazed ceramic tiles are available in a wide range of colors and patterns, making them a versatile option for any bathroom design. 3. Terracotta Tiles: Terracotta tiles are unglazed ceramic tiles made from natural clay. These tiles have a warm, earthy look that adds a rustic charm to any bathroom. While terracotta tiles are not as water-resistant as porcelain or glazed ceramic tiles, they can be sealed to improve their performance in wet areas. 4. Mosaic Tiles: Mosaic tiles are small ceramic tiles that are mounted on a mesh backing to create intricate patterns and designs.
…
 These tiles are a popular choice for accentuating bathroom floors with a pop of color or a unique design element. Mosaic tiles are available in a variety of shapes, sizes, and colors, allowing for endless creative possibilities. Installation of Bathroom Floor Ceramic Tile: Installing ceramic tiles on a bathroom floor is a DIY-friendly project that can be accomplished with the right tools and materials. However, for large or complex projects, it is recommended to hire a professional tile installer to ensure a flawless finish. Here are the steps involved in installing bathroom floor ceramic tile: 1. Preparation: Before installing ceramic tiles, ensure that the subfloor is clean, dry, and level. Remove any old flooring, adhesive, or debris from the surface. Apply a waterproofing membrane or backer board to protect the subfloor from moisture. 2. Layout: Plan the layout of the tiles to ensure a symmetrical and aesthetically pleasing design. Use tile spacers to create even grout lines and maintain consistency throughout the installation process. 3. Adhesive Application: Apply thin-set mortar adhesive to the subfloor using a trowel, working in small sections at a time. Press the tiles firmly into place, ensuring they are level and aligned correctly. 4. Grouting: Once the tiles are set, allow the adhesive to cure for the recommended time before grouting. Use a rubber grout float to apply grout between the tiles, pressing it into the joints and wiping off any excess with a damp sponge.


Your comment submitted.