One of the best stair ceramic tile product lines is Zanzibar Tiles. You can choose from a variety of colors with the lowest possible costs here we are going to talk about them and guide you on how to install stair tile edge trim. Any tile pattern is given a clean, polished appearance with tile trimmings.
Avoid skipping this step at any cost. Tile trim hides any rough or pointed edges, reduces cleaning and maintenance requirements, and safeguards a tile installation for many years to come. Trim installation is just as challenging as tile installation as a whole.
Similar supplies are required, such as mortar, glue, and trowels. The next final phase in the tile installation process is to add tile trim. Any tile pattern is given a clean, polished appearance with stair tile trimmings. Avoid skipping this step at any cost.
Tile trim hides any rough or pointed edges, reduces cleaning and maintenance requirements, and safeguards a tile installation for many years to come. Trim installation is just as challenging as tile installation as a whole.
Similar supplies are required, such as mortar, glue, and trowels. The next to final phase in the tile installation process is to add tile trim. If you can’t find a design you like, you can also paint tile.
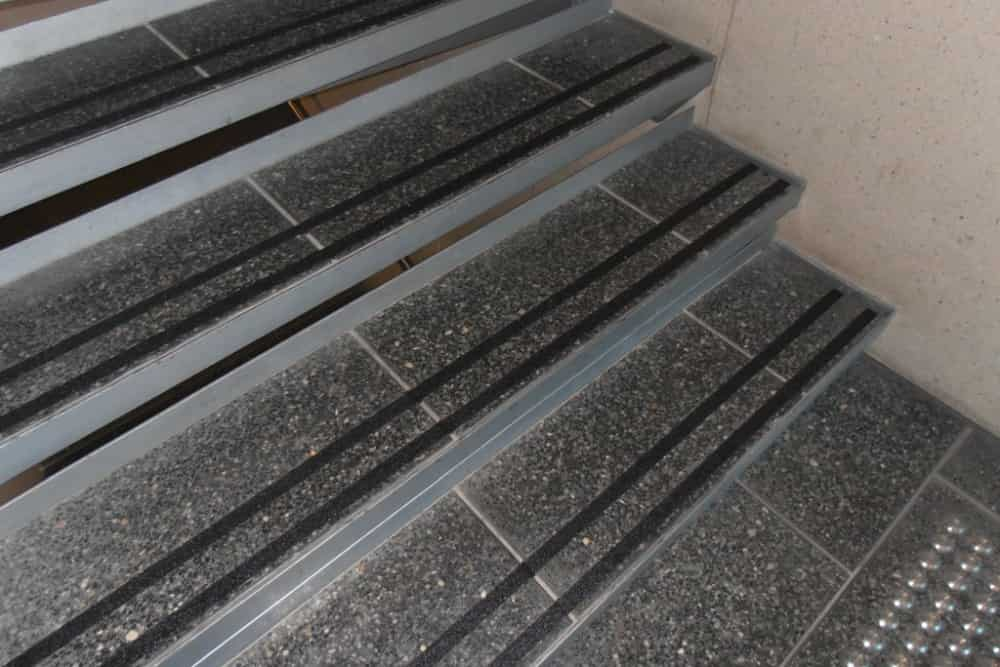
stair tile Trim Types: Although there are many various kinds of tile trim, the following are the most popular choices. Bullnose: One of the most often used trims is bullnose stair tile trim. They provide a polished, smooth appearance that guards against dangerously sharp edges. The curved edges of bullnose trims fit perpendicularly around the tile corner edges.
They may be put over the seam where the wall meets the floor or in the corners of walls, backsplashes, tubs, and stairs. Fourth Round: Quarter-round trimmings are often a quarter of a circle in size, as their name indicates.
They protect an exposed perpendicular edge by creating a smooth, uniform, radially rounded corner. The margins of restrooms, showers, benches, tubs, and doors are ideal places to use them to turn a corner.
Base Cove: Where the floor meets a stair wall tile, cove base trims are often applied. Their curved edge conceals the junction elegantly and offers water-resistant protection to prevent moisture from penetrating the floors or walls. Along the base of showers, they are very helpful.
When these sorts of trimmings are fitted, cleaning should be simple and less often. Baseboard: Baseboards are often put in place at the seam where the wall and the floor meet. They are particularly helpful in moist locations like bathrooms or showers, much like cove base trims. They have a straight edge that has to be properly caulked to be waterproof, unlike cove base trims, however. Baseboards made of tile are a wonderful choice for often cleaned areas.
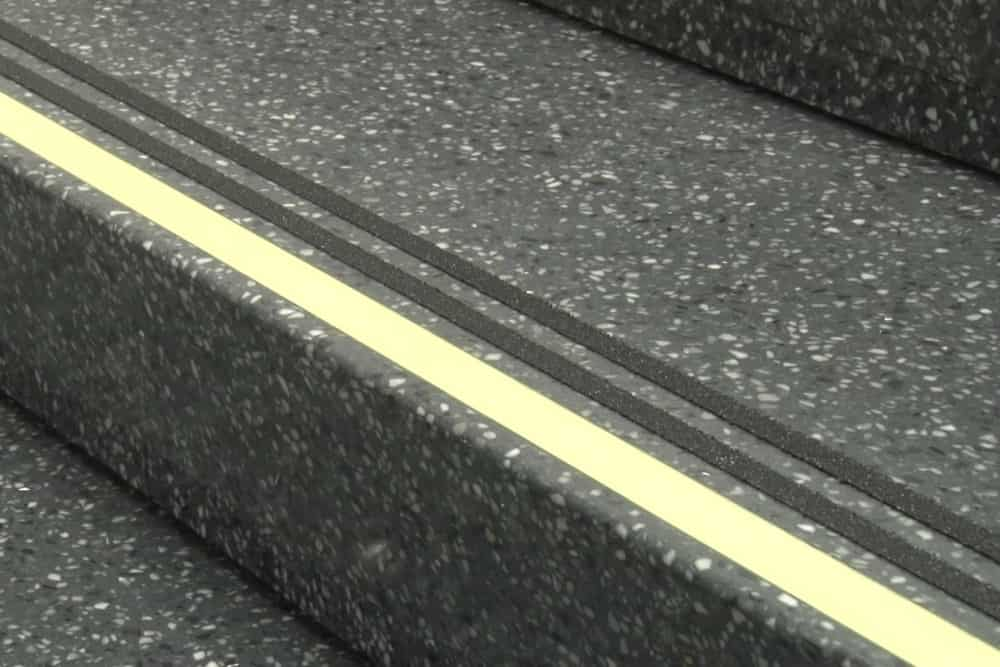
Pencil: Round stair edges and a cylindrical form characterize pencil trimmings (roughly like a pencil). On walls, they are often utilized around the margins of mosaic patterns. They aid in establishing boundaries or defining the design’s conclusion.
They also provide a fantastic standout piece for areas when the design switches between different tile shapes. Square Liner: Flat-liner stair trims are used to frame patterns or standout items similarly to pencil trimmings.
However, flat liners are flat, straight pieces of tile as opposed to being rounded. Although they don’t have the same depth as pencil trimmings, they may provide a style that is more streamlined and modern. For framing edges where various materials (such as tile and wood) meet, flat liners are ideal, particularly on the floor where rounder tile may not be required.
seat rail; Baseboard trims were first used as chair rail tile trims to stop chairs from scuffing walls. They are now more often utilized to give backsplashes or mosaic tiles an elaborate, architectural framing.
They have carved ornate molding that is less clumsy than a plain tile baseboard yet offers more depth than a flat liner-Cap: The only stair tile trims that can fully enclose perpendicular corners in tile installations are V-caps.
They are typically used to finish the edges of sinks on worktops in the kitchen and bathroom. They may also be utilized as shower niches, window sills, or room walls.
When to Install stair trim for tile: The next-to-last phase in a tile installation process should be installing tile trim.
It’s crucial to avoid skipping the tile trim installation in favor of saving time or money. Tile trims provide a finishing touch and extend the life of tiles. Only where the tile meets flat against other surfaces, such as wall corners or floor edges, may tile trim not be required. The usage of continuous tile patterns is an alternative to adding tile trim.
Considerations for Safety: Put on gloves to avoid being cut by the jagged tile edges. When trimming or covering tiles, take care not to break them. When cutting tile, always wear safety goggles, gloves, and, if using an electric or gas-powered cutter, ear protection as well. Tools: Sealant gloves, tape measure, Level, square for framing, Materials of your choosing, Adhesive, Spreader for adhesive, Trowel, Spacers (optional). Instructions:
1. Identify the areas that need stair trimming: To start, go over the tile design to identify any areas that may have jagged edges, ugly hard lines, or gaps between the tile and other materials. Typical areas where you could think about putting trim include
2. Select a layout: Choose a kind of trim that goes well with your tile installation. Here is your chance to be imaginative. You may choose a trim that matches the pattern of the tiles, adds a distinctive, high-end accent, or has contrasting colors for a striking appearance.
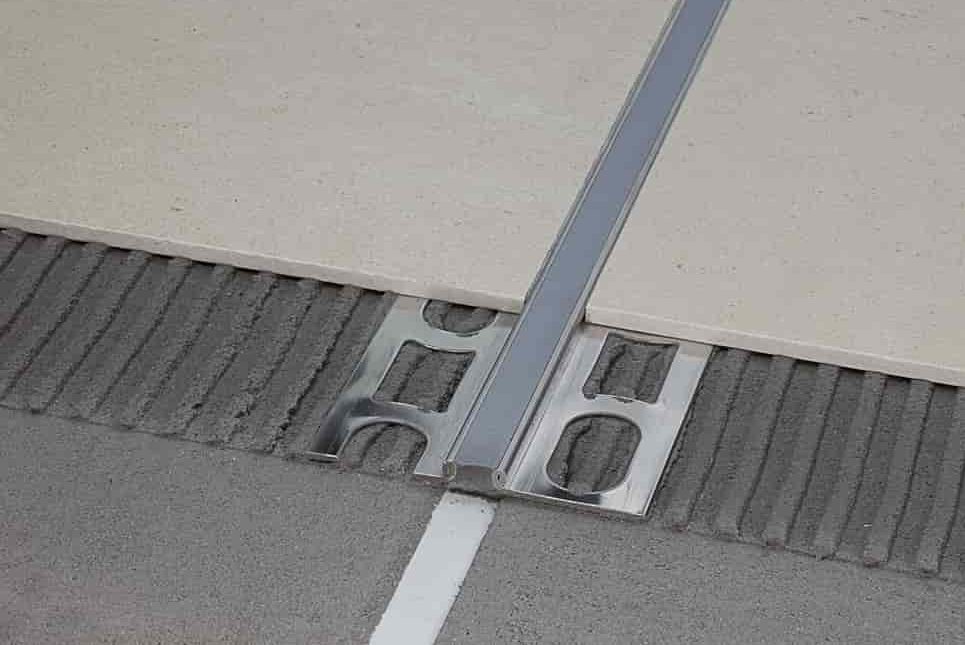
3. Calculate edges; The locations in which the trim will be put should be measured. Count the number of tile pieces required to finish the trim. To ensure that you have the proper size and number of tile trim pieces, supply your tile trim supplier with precise dimensions.
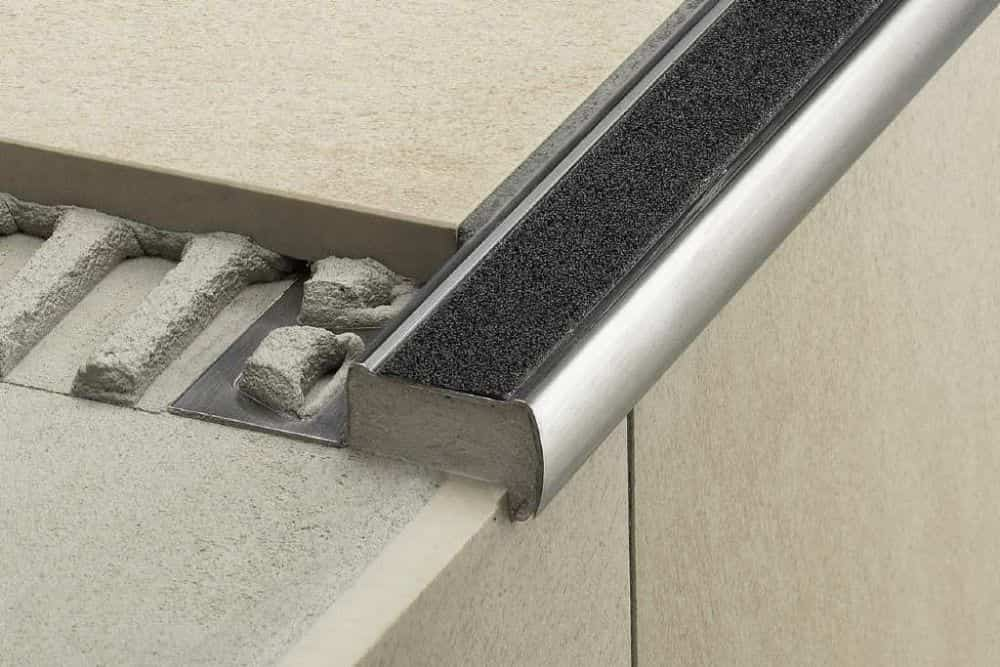
4. Apply mortar or adhesive: Prepare to install the tile trim after all of your supplies are ready. Prior to finishing the full tile installation, be sure to add the trim. On the margins where the trim will go, spread mortar with a trowel or apply the adhesive with a caulking gun. Apply this to each tile separately to prevent the adhesives from drying out.
5. Even Out the Mortar or Adhesive: To smooth out the mortar, use a trowel. Applying a consistent coating of glue will be easier with the aid of a caulking gun.


Your comment submitted.