Repair and replacement for historic ceramic tiles, whether they are laid on floor or wall, need to be done in different section. The Standards for the Treatment of Historic Properties that are outlined by the Secretary of the Interior place a strong emphasis on the retaining and preserving of historic architectural materials.
It is never recommended to replace anything if it can be preserved or repaired instead. In general, loose mortar or grout as well as mortar joints that have deteriorated can be repaired.
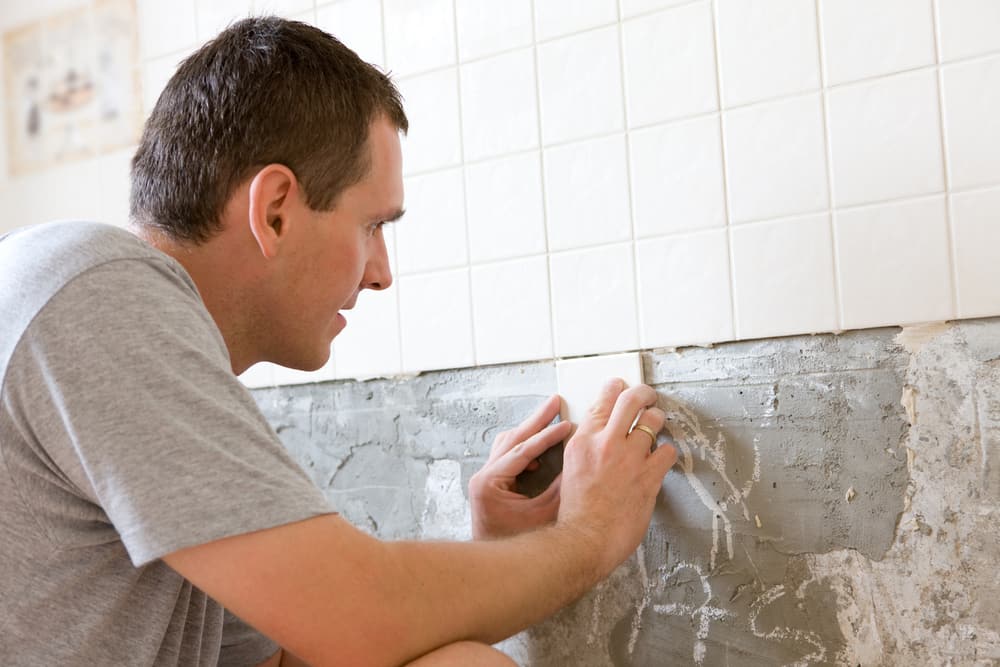
In the beginning, it is important to check the entire floor for any loose tiles that need to be re-grouted. In order to get ready for regrouting, the damaged mortar has to be removed by hand in a meticulous manner, and the joints have to be either moistened or treated with a bonding agent.
When repairing mortar, it is essential to use grout that has a color and consistency that is quite similar to the mortar that was previously there.
Historic Ceramic Tiles Repair
One historic ceramic tile can put nearby tiles at danger if you try to remove it. Therefore, rather of replacing a slightly damaged tile, it could be preferable to repair and keep it. Using epoxy glue or grout, it is occasionally possible to fix cracks or rejoin a broken tile corner or piece.
A carefully applied patch of epoxy combined with colored enamel or mortar tinted to blend with the tile, if a tile is chipped or has a little corner or edge missing, may be less obvious than attempting to replace every tile that even has the slightest damage. It is also a more effective preservation method.
In a few rare cases, a conservator may successfully cure glaze failure or surface powdering of ceramic floor tiles with a specifically formulated, solvent-based mineral densifying agent (such silicic acid), followed by a siloxane sub-surface repellent, applied 24 hours later.
In the correct situations, a treatment like this can bind and harden the surface, reduce tile absorbency, and keep vapor transmission.
But since this is such a difficult task, a conservator should only attempt it after conducting the necessary testing. These substances are not only extremely poisonous and hazardous to handle, but if applied incorrectly, they can also harm tile more severely.
Replaced tiles
If a single tile, a major chunk of it, is missing, if it has been severely damaged and cannot be repaired, or if it has become a safety hazard, a historic ceramic tile floor should be replaced.
There are a number of factors that need to be considered before settling on a preservation solution for a ceramic tile floor that has become damaged as a result of long-term wear and abrasion, settling, or vibration damage to the setting bed.
The floor’s condition has deteriorated as a result of these factors. If the damage to the tiles was caused by something other than normal wear and tear, the problem must first be tracked down and repaired before the damaged tiles may be replaced.
Both the condition of the substrate on which the tiles are installed and the availability of matching tiles are crucial factors in determining whether or not the replacement will be effective. Before installing the replacement tiles, any problems, such as settling or vibration, need to be fixed.
Additionally, it is possible that the height of the new setting bed needs to be adjusted to account for the thickness of the new tiles.
When only a small number of tiles are compromised, this careful approach—typically an attempt to replace only the most significantly damaged tiles—is frequently used or considered.
Replacement frequently necessitates the use of specially created reproduction tiles unless old, matching tiles can be discovered and reused.
In rare cases, damaged historic tiles can be replaced by matching ones that were rescued from less noticeable portions of the floor or from neighboring structures. The replacement tiles could either be plain and simple to match, or they should be ornamented with a typical ancient floor tile design.
It can be useful to know the tile’s maker and, if possible, the approximate date of manufacture in order to replace broken tiles.
Although stylistic resemblances to other identified tiles may occasionally give a hint as to the maker, many mass-produced tiles are not labelled and give little or no information as to their origin. While many companies produced bisque tiles (basic, unglazed, once-fired tiles) for both their own usage and that of other businesses, certain decorating enterprises hardly ever signed their work.
Identifying marks are often located on the tile’s back. The name or initials of the company that created the tile or the bisque may be imprinted or molded into the back of the tile.
Occasionally, a printed or painted mark will identify whether the decoration was done by a different company or artist. Construction paperwork and old building records may contain details on the tile supplier or manufacturer. For the purpose of locating the tile manufacturer of unmarked tiles, historical catalogs may also be helpful.
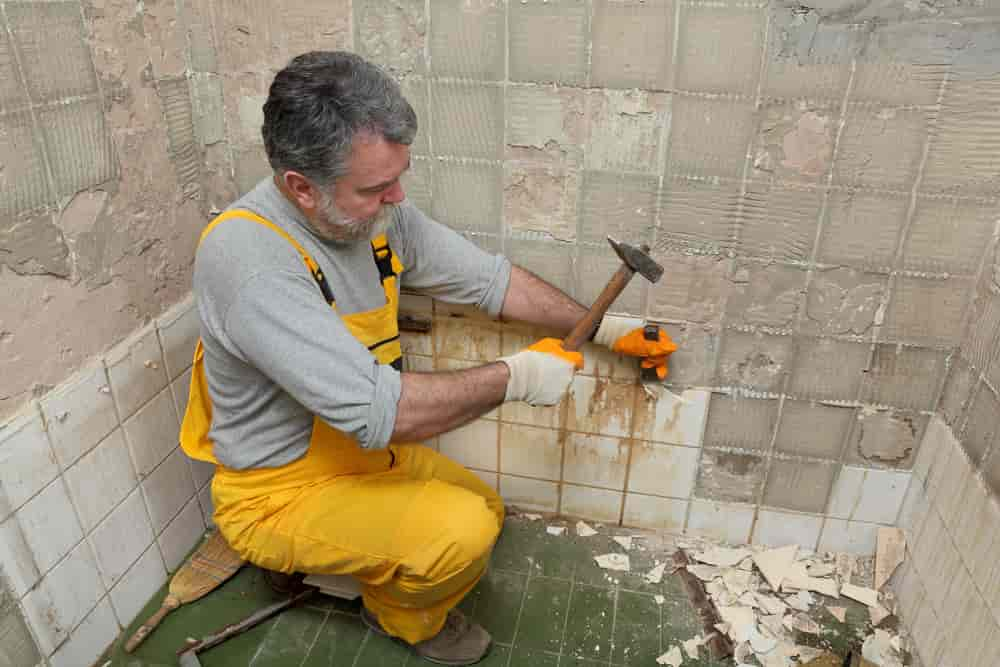
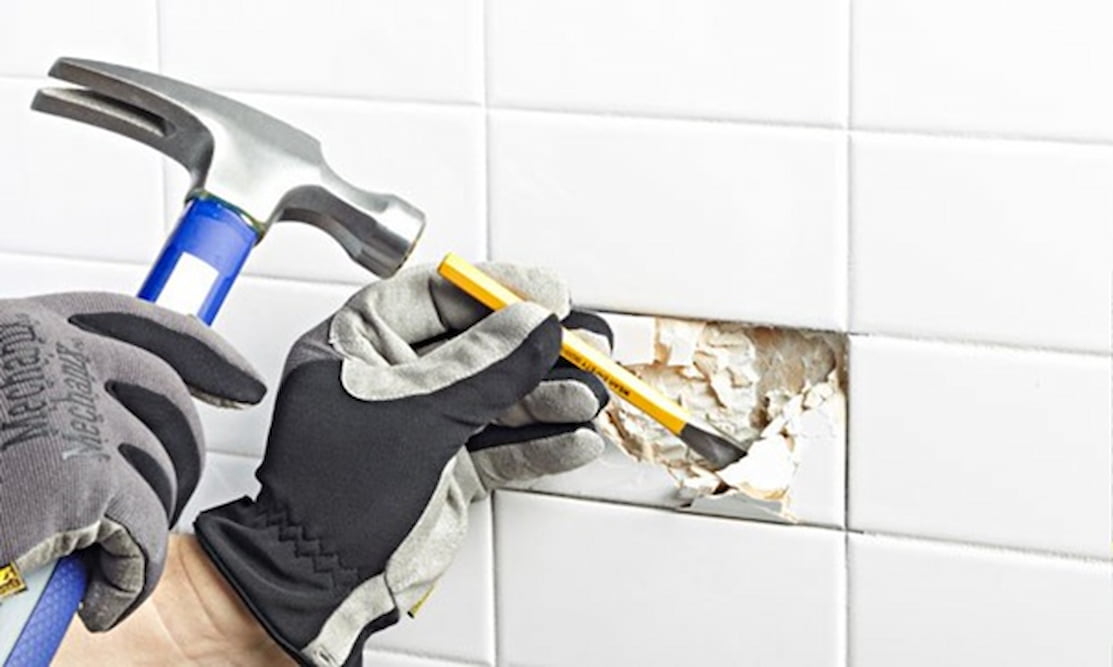
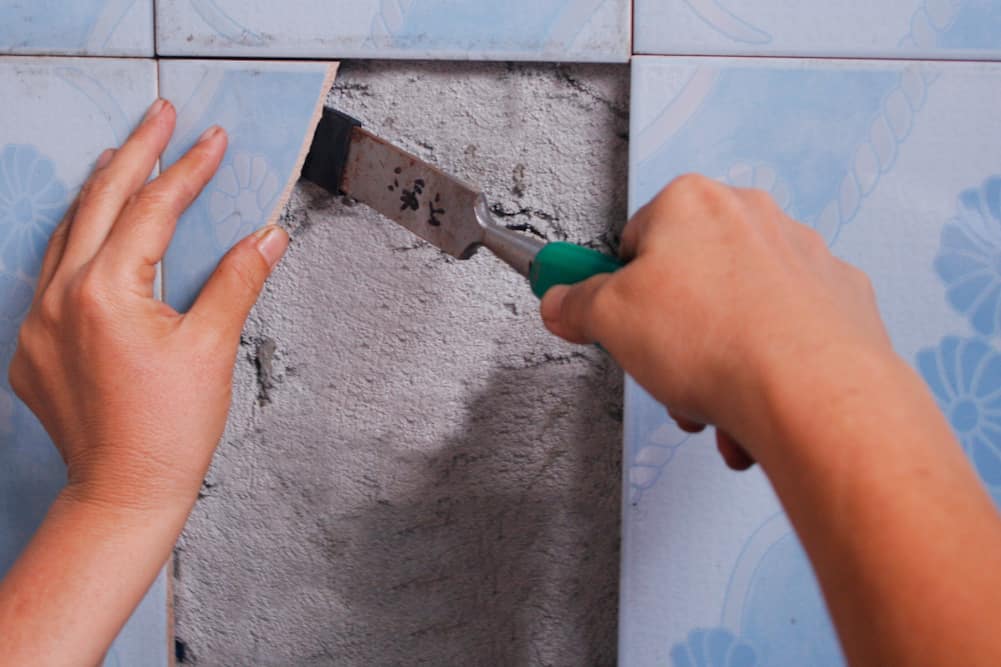
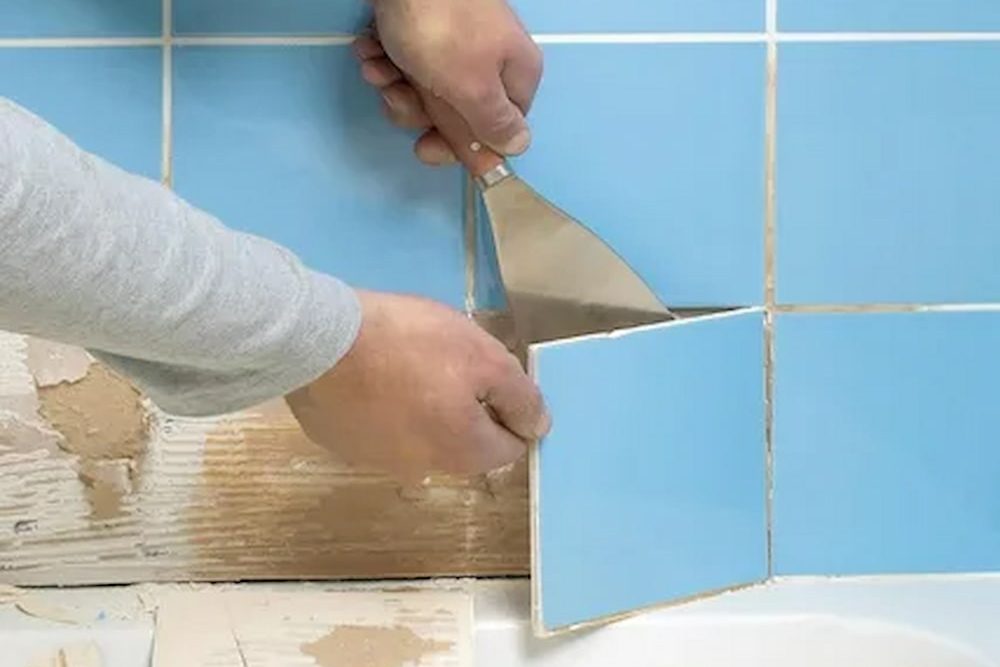
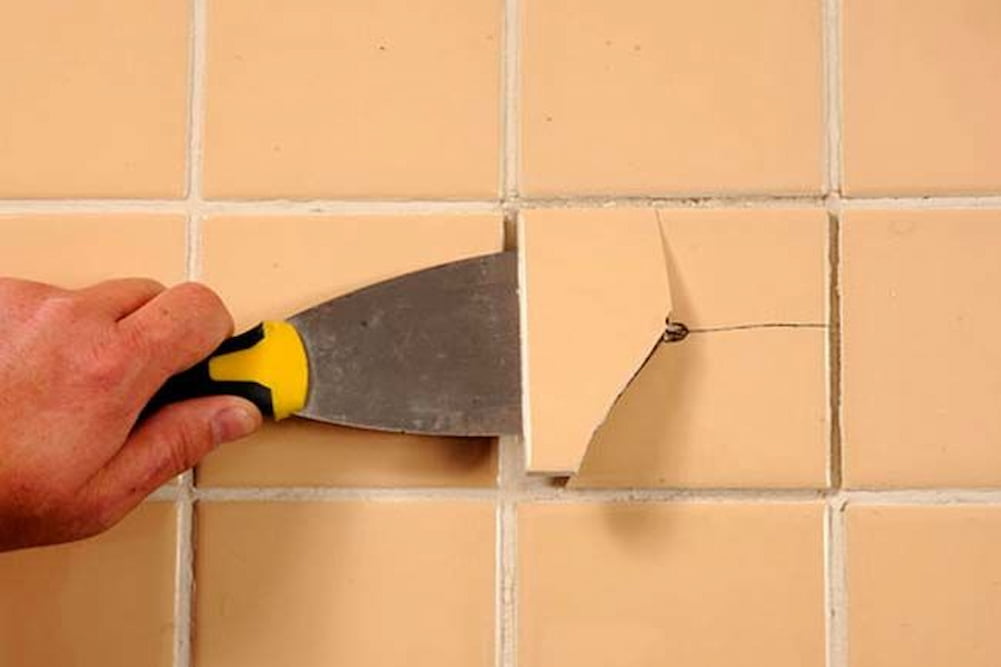
The ability to remove just the deteriorated tile without damaging neighboring tiles is the foundation for replacing a single damaged tile.
Because a hammer and chisel are employed, attempts to remove one or more damaged tiles frequently end in failure.
The tiles nearby are cracked as a result of the shock from the blows to the tile being removed, which pass through the grout. All of the grout around the tile must be taken out to prevent damage to good tiles.
An expert tile installer can achieve this most effectively by utilizing a grout saw, a hand tool, or, for grout joints wider than 3/8″, a dry-cutting diamond blade placed in an angle grinder or circular saw.
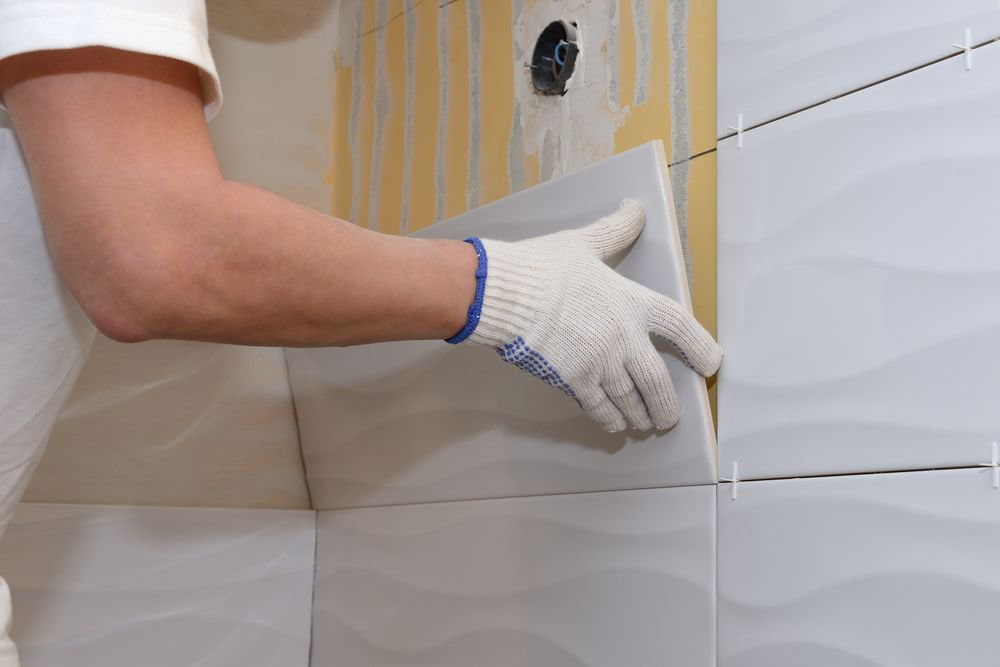
It is possible that extra issues will arise while selectively replacing broken tiles with replica tiles. New tiles, particularly encaustic tiles, frequently have a variable thickness and a little bit of a different color and design than older tiles.
This is the case even if the reproduction process is extremely precise. Because of this, there is a potential for both cosmetic and structural difficulties, particularly if the replacements are put in piecemeal.
If the setting bed does not include sufficient mortar to firmly grip and secure the new tile, it will eventually become dislodged if that tile is put among the already installed ones.
If the old tiles and the new tiles are both of a different thickness, the setting bed in which the new tiles are laid must be at a different height in order to produce a final surface that is level over its entirety.
There is a possibility that the two layers of setting beds are constructed out of distinct materials. Of these materials, one could be harder, more long-lasting, and less flexible than the other.
This could potentially lead to problems, given that the setting bed foundation needs to function and react as a unit to the stress and strains that are placed upon it.
Tiles Replacement in Sections
In some cases, the best course of action may be to completely remove a part of damaged original floor tiles and have a complete replacement in those sections of floor with new reproduction tiles.
This approach has the advantages of being able to lay a level setting bed and producing a final item that is uniform in color and pattern match.
Original tiles that are still in good condition can be kept and utilized in other portions where only a few tiles are damaged, despite the fact that this method might involve replacing more original tiles with reproduction tiles than may actually be necessary.
This method is typically best suitable when the region that needs to be replaced is the most damaged part of the floor or when it is in a location where the removed tiles will provide enough salvaged fragments to allow in-kind repair of a more visually prominent area.
It can be a good idea to employ modern materials and installation techniques, including expansion joints or flexible expansion material, when installing a portion of replica tiles.
The absence of expansion joints is one of the main reasons why ceramic floor tile installation fails and why tiles crack, break, or become disbonded. When installing antique ceramic tile floors, expansion joints were occasionally used, and they are typically the ones that have endured in the best shape.
Due to their limited color palette, traditional expansion joint filler materials are often resisted by preservation contractors.
The grout joints around it can be matched with new flexible sealants that come in a variety of colors and textures, including sanded and unsanded. Because of this, the expansion joints are practically undetectable. If the tile manufacturer suggests it, a bonding agent may also be taken into account. Any installation instructions or installation drawings provided by the manufacturer should be followed.
Before choosing which preservation method is most suited to the specific flooring issue, the manager or owner of a historic property should weigh the benefits and drawbacks of each treatment. For instance, it’s common to see very little variations in the old and new tiles’ form, size, color, and pattern.
Even a difference of 1/8″ or 1/16″ in size or dimension between the original and replica tiles, when replacing an entire piece, can prevent the new tile section from fitting inside an existing border.
Despite the manufacturer receiving drawings and images, there can be some difference in the design and pattern size on the new tiles.
As a result, they might not line up properly with the original tiles, making the area of the floor that has been changed rather noticeable.
In many different types of small, as well as large, private and public structures across the United States, historic ceramic tiles are a common flooring material. Traditional ceramic floor tiles, whether plain or with decorative patterns, play a significant role in defining the personality of historic structures.
Despite being a useful material, ceramic floor tiles are extremely delicate and are quickly harmed by poor installation methods, careless remodeling, severe cleaning techniques, and even everyday use. Careful daily upkeep is necessary to preserve them.
This should start with cleaning them with mild, non-abrasive techniques and supplies, and, in some cases, protecting them with an appropriate coating or impregnator.
Due to its maker, their distinctive design, or their placement in a particular room or structure, some historic ceramic tile flooring may be more significant than those that are just functional.
Such floors require special attention, and if possible, a ceramics conservator or preservation specialist should be consulted to create responsible maintenance schedules and offer advice on repair and replacement methods.
It might be best to leave a historic ceramic tile floor alone unless it has significant damage, including numerous missing and broken tiles and is therefore potentially dangerous.
Even tiny cracks, chips, or scratches in the tiles themselves as well as uneven wear on the floor’s surface do not always indicate that they need to be replaced.
Rarely do such very small flaws diminish the charm of an old ceramic tile floor. They might even add character and be less obvious or intrusive than replacing a portion or a single tile with new tiles that don’t exactly match the old ones.
Before choosing the preservation strategy that is ideal for the project, each circumstance should be assessed on its own merits.
The tile experts of our team are ready and eager to work with professional traders and importers around the world.


Your comment submitted.