Are you looking to add a touch of elegance and sophistication to your kitchen or bathroom? A DIY glass tile backsplash can be the perfect solution to elevate the aesthetics of your space. Glass tiles are not only stylish but also durable and easy to maintain, making them a popular choice among homeowners. In this comprehensive guide, we will explore everything you need to know about DIY glass tile backsplash installation, from choosing the right tiles to the step-by-step process of creating a stunning backsplash design. Why Choose Glass Tiles for Your Backsplash: Glass tiles are a versatile and visually appealing option for a backsplash.
.
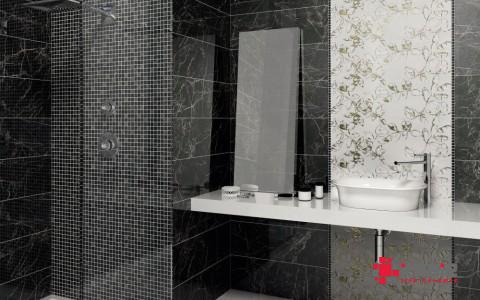
 They come in a wide range of colors, sizes, and finishes, allowing you to create a customized look that complements your existing decor. Glass tiles are also non-porous, making them resistant to water and stains, which is ideal for high-moisture areas like kitchens and bathrooms. Additionally, the reflective properties of glass can help to brighten up a space and create a sense of depth. Choosing the Right Glass Tiles: Before you embark on your DIY glass tile backsplash project, it’s essential to choose the right tiles that suit your style and budget. Glass tiles come in various types, including subway tiles, mosaic tiles, and larger format tiles. Consider the size and shape of the tiles, as well as the color and finish. If you want to add a pop of color or a pattern to your backsplash, mosaic tiles can be a great choice.
..
 On the other hand, if you prefer a sleek and modern look, subway tiles in a neutral hue may be more suitable. Preparing Your Workspace: Before you begin installing your glass tile backsplash, it’s crucial to prepare your workspace to ensure a smooth and successful project. Start by cleaning the wall surface where the tiles will be installed, removing any grease, dirt, or debris. If you are working in a kitchen, consider removing any appliances or fixtures that may get in the way. Protect your countertops and floors with drop cloths to prevent any damage from tools or materials. Gathering the Right Tools and Materials: To install your DIY glass tile backsplash, you will need a few essential tools and materials. These may include: – Glass tiles – Tile adhesive – Tile spacers – Grout – Grout float – Tile cutter or wet saw – Trowel – Sponge – Bucket for mixing grout – Level – Measuring tape Make sure you have all the necessary tools and materials on hand before you begin your project to avoid any interruptions.
…
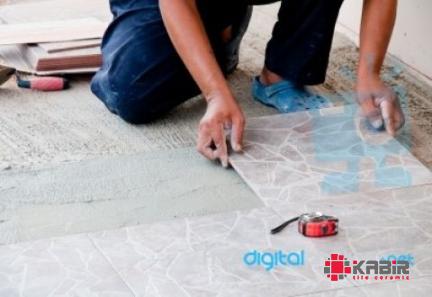
 Step-by-Step Guide to Installing a Glass Tile Backsplash: 1. Measure and Plan: Start by measuring the area where you plan to install the glass tile backsplash and calculate the number of tiles you will need. Create a layout plan to determine the arrangement of the tiles and any necessary cuts. 2. Prepare the Wall: Apply a coat of primer to the wall to ensure proper adhesion of the tile adhesive. Allow the primer to dry completely before proceeding. 3. Mix the Adhesive: Follow the manufacturer’s instructions to mix the tile adhesive to the right consistency. Use a trowel to apply the adhesive to the wall in small sections. 4. Install the Tiles: Begin placing the glass tiles on the wall, starting from the center and working your way outwards. Use tile spacers to maintain even spacing between the tiles. Press each tile firmly into the adhesive to ensure a secure bond. 5. Cut Tiles as Needed: Use a tile cutter or wet saw to make any necessary cuts to fit the tiles around outlets, corners, or other obstacles. Wear appropriate safety gear when cutting tiles to prevent injury. 6. Allow the Adhesive to Set: Once all the tiles are in place, allow the adhesive to dry according to the manufacturer’s instructions. This usually takes 24-48 hours.


Your comment submitted.