In the realm of interior design, the backsplash is a small but mighty element that can significantly impact the look and feel of a space. A bright tile backsplash adds a pop of color, personality, and style to your kitchen or bathroom, creating a focal point that elevates the overall aesthetic. Whether you’re looking to refresh your existing space or embarking on a renovation project, bright tile backsplashes offer endless design possibilities. In this comprehensive guide, we’ll explore everything you need to know about incorporating a bright tile backsplash into your home, from choosing the right tiles to installation tips and design inspirations.

.
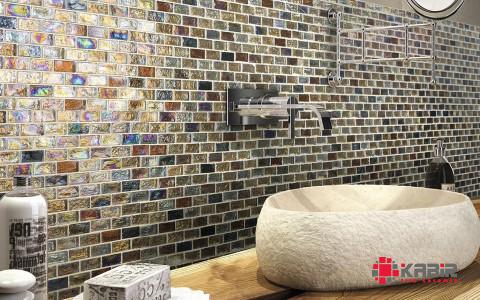
 **Why Choose a Bright Tile Backsplash?** A bright tile backsplash serves as a striking visual element that can transform a dull and lifeless space into a vibrant and energetic environment. The use of bold and vivid hues in your backsplash can instantly uplift the mood of the room, making it feel more inviting and dynamic. Whether you opt for a monochromatic color scheme or mix and match different shades, a bright tile backsplash allows you to express your personality and style through color. Additionally, bright tile backsplashes are a versatile design choice that can complement a wide range of kitchen styles, from modern and contemporary to traditional and eclectic. They can be used to create a focal point in an otherwise neutral space or to tie together various elements of the room, such as the cabinetry, countertops, and flooring. The reflective nature of glazed tiles can also help to bounce light around the room, making the space feel brighter and more spacious. **Choosing the Right Tiles** When it comes to selecting tiles for your bright tile backsplash, the options are virtually endless. From classic subway tiles to intricate mosaic patterns, there’s a wide variety of shapes, sizes, colors, and finishes to choose from. Here are some factors to consider when choosing the right tiles for your backsplash: 1. **Color**: The color of your tiles will play a significant role in the overall look and feel of your backsplash. Bright and bold colors like turquoise, yellow, red, or green can create a lively and energetic atmosphere, while softer pastel shades can lend a more serene and calming vibe to the space.
..
 2. **Material**: Tiles come in a range of materials, including ceramic, porcelain, glass, and natural stone. Each material has its own unique characteristics in terms of durability, maintenance, and aesthetic appeal. Glass tiles, for example, are known for their luminous quality and easy maintenance, making them a popular choice for bright and reflective backsplashes. 3. **Shape and Size**: The shape and size of the tiles can also impact the visual impact of your backsplash. Larger tiles can create a more seamless and streamlined look, while smaller mosaic tiles can add texture and visual interest to the space. Consider mixing different tile shapes and sizes to create a custom and dynamic design. 4. **Finish**: The finish of the tiles, whether glossy, matte, or textured, can affect the overall look and feel of your backsplash. Glossy finishes are highly reflective and can brighten up the space, while matte finishes offer a more subdued and sophisticated look. Textured tiles can add depth and dimension to the design. **Installation Tips for Bright Tile Backsplash** Installing a bright tile backsplash is a DIY-friendly project that can be completed over a weekend with the right tools and materials.
…
 Here are some tips to help you achieve a professional-looking finish: 1. **Prepare the Surface**: Before installing the tiles, make sure the wall surface is clean, dry, and free of any debris. If necessary, patch any holes or uneven areas to create a smooth and flat surface for the tiles to adhere to. 2. **Measure and Plan**: Measure the area of your backsplash and calculate the number of tiles needed, taking into account any cuts or adjustments that may be required. Create a layout plan to ensure a symmetrical and balanced design. 3. **Use High-Quality Adhesive**: Invest in a high-quality adhesive that is suitable for the type of tiles you’re using. Follow the manufacturer’s instructions for mixing and applying the adhesive to ensure a strong bond. 4. **Grout Carefully**: After the tiles are set, allow them to cure for the recommended time before grouting. Choose a grout color that complements your tiles and use a grout float to spread the grout evenly and fill in the gaps between the tiles. Wipe off excess grout with a damp sponge before it dries. 5. **Seal the Grout**: To protect the grout from moisture and staining, apply a grout sealer according to the manufacturer’s instructions. This will help prolong the life of your backsplash and keep it looking fresh and clean.





Your comment submitted.