In the world of interior design, tiles play a crucial role in transforming spaces, adding elegance, functionality, and character to any room. And when it comes to timeless charm and practicality, 8×10 ceramic wall tiles stand out as a popular choice for homeowners and designers alike. In this comprehensive guide, we delve into the world of 8×10 ceramic wall tiles, exploring their benefits, design possibilities, installation techniques, and maintenance tips to help you make informed decisions and create stunning spaces that reflect your unique style.
.
 **1. Understanding 8×10 Ceramic Wall Tiles** At the heart of every well-designed space lies the foundation of carefully chosen materials, and 8×10 ceramic wall tiles exemplify durability, versatility, and aesthetic appeal. These tiles measure 8 inches by 10 inches, offering a balanced size that can enhance various design schemes. Ceramic tiles are made from clay that is kiln-fired at high temperatures, resulting in a durable and water-resistant product that is ideal for wall applications. **2. Benefits of 8×10 Ceramic Wall Tiles** – **Durability**: Ceramic tiles are renowned for their toughness and longevity, making them an excellent choice for high-traffic areas in your home such as kitchens, bathrooms, and entryways. – **Water Resistance**: The non-porous nature of ceramic tiles makes them resistant to water and moisture, making them perfect for areas prone to spills and splashes. – **Versatility**: 8×10 ceramic wall tiles come in a wide range of colors, patterns, and finishes, allowing you to unleash your creativity and personalize your space according to your tastes. – **Easy Maintenance**: Ceramic tiles are a breeze to clean and maintain, requiring simple wiping or mopping to keep them looking fresh and vibrant. – **Affordability**: Ceramic wall tiles offer excellent value for money, providing a cost-effective solution for updating your home with a touch of style and sophistication.
..
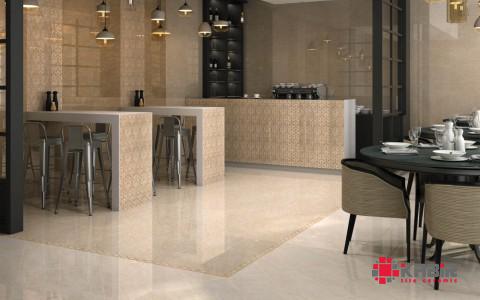
 **3. Design Possibilities with 8×10 Ceramic Wall Tiles** One of the most exciting aspects of working with 8×10 ceramic wall tiles is the endless design possibilities they offer. Whether you prefer a classic, contemporary, or eclectic look, ceramic tiles can be tailored to suit your aesthetic preferences. Here are some design ideas to inspire you: – **Subway Tile Patterns**: Create a timeless look with classic subway tile patterns laid in a staggered brick layout, adding a touch of understated elegance to your space. – **Geometric Designs**: Experiment with geometric shapes and patterns to bring a modern edge to your walls, playing with hexagon, chevron, or herringbone layouts for a bold statement. – **Mix and Match**: Combine different colors, textures, and finishes of ceramic tiles to design custom patterns and accents, adding texture and visual interest to your walls. – **Accent Walls**: Use 8×10 ceramic wall tiles to create stunning accent walls in your kitchen, bathroom, or living room, highlighting a focal point and injecting personality into the space.
…
 **4. Installation Techniques for 8×10 Ceramic Wall Tiles** Proper installation is key to ensuring the longevity and aesthetics of your ceramic wall tiles. While hiring a professional tiler is recommended for complex projects, you can also undertake a DIY installation with the right tools and knowledge. Here are the general steps involved in installing 8×10 ceramic wall tiles: – **Surface Preparation**: Ensure that the wall surface is clean, dry, and free from any debris or dust before starting the installation process. – **Layout Planning**: Determine the layout of your tiles, considering factors such as symmetry, surrounding fixtures, and grout lines for a balanced design. – **Adhesive Application**: Apply tile adhesive to the wall using a notched trowel, spreading it evenly to create a strong bond for the tiles. – **Tile Installation**: Place the ceramic tiles on the adhesive, pressing them firmly and using tile spacers to maintain consistent grout lines between the tiles. – **Grouting**: Once the adhesive has dried, apply grout between the tiles, using a grout float to fill the spaces and a damp sponge to clean off excess grout from the tile surfaces.


Your comment submitted.