In the realm of interior design, every detail counts, and the choice of flooring can make a significant impact on the overall aesthetic and functionality of a space. Among the myriad options available, 9×12 ceramic tiles stand out for their versatility, durability, and timeless appeal. In this comprehensive guide, we delve into the world of 9×12 ceramic tiles, exploring their characteristics, applications, installation, maintenance, and design possibilities. Whether you are renovating your home, planning a commercial project, or simply seeking inspiration, this article will equip you with the knowledge to make informed decisions and unleash the full potential of these elegant tiles. Understanding 9×12 Ceramic Tiles: 9×12 ceramic tiles are a popular choice for flooring and wall applications in residential and commercial settings.
.
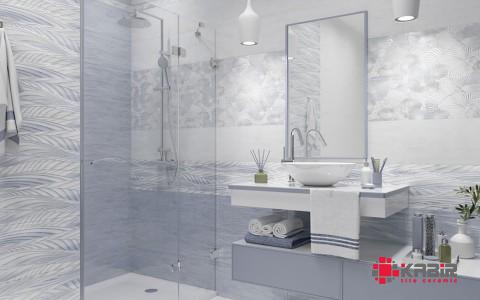
 These tiles, measuring 9 inches by 12 inches, strike a balance between traditional square tiles and elongated rectangular tiles, offering a versatile canvas for various design schemes. Ceramic tiles are made from clay that is molded, glazed, and fired at high temperatures, resulting in a durable and water-resistant product suitable for high-traffic areas such as kitchens, bathrooms, entryways, and living spaces. Characteristics of 9×12 Ceramic Tiles: 1. Variety of Designs: 9×12 ceramic tiles come in a plethora of designs, colors, patterns, and finishes, allowing for endless creativity in design. From classic neutrals to bold geometrics, the design options are extensive, catering to diverse preferences and styles. 2. Durability: Ceramic tiles are known for their durability and resistance to scratches, stains, and moisture. When properly installed and maintained, 9×12 ceramic tiles can withstand the test of time, making them a cost-effective flooring solution. 3. Easy Maintenance: Cleaning ceramic tiles is a breeze, requiring simple routine maintenance such as sweeping, mopping, and occasional sealing to preserve their beauty and longevity.
..
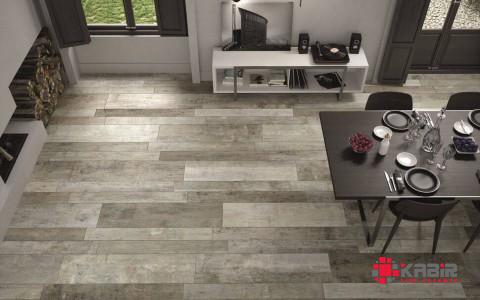 4. Versatility: Whether used for floors, walls, backsplashes, or even countertops, 9×12 ceramic tiles can adapt to various applications, adding a touch of elegance and sophistication to any space. Applications of 9×12 Ceramic Tiles: 1. Flooring: One of the most common uses of 9×12 ceramic tiles is for flooring, where their durability and easy maintenance make them ideal for high-traffic areas. Whether in kitchens, bathrooms, living rooms, or commercial spaces, ceramic tiles add style and functionality to any floor. 2. Walls: Ceramic tiles are a versatile option for wall applications, adding texture, color, and visual interest to spaces such as showers, backsplashes, and accent walls. The uniform size of 9×12 tiles allows for seamless installation and creates a polished look. 3. Backsplashes: In kitchens and bathrooms, 9×12 ceramic tiles can be used to create stunning backsplashes that protect walls from splashes and spills while enhancing the overall design aesthetic. The wide range of colors and patterns available allows for customization and personalization.
…
 4. Countertops: For a durable and stylish countertop option, consider using 9×12 ceramic tiles. When properly installed and sealed, ceramic tiles can withstand heat, scratches, and stains, making them a practical choice for busy kitchen and bathroom countertops. Installation of 9×12 Ceramic Tiles: Proper installation is key to the longevity and performance of 9×12 ceramic tiles. Whether you choose to hire a professional installer or tackle the project yourself, here are the essential steps involved in installing ceramic tiles: 1. Preparation: Ensure the subfloor or wall surface is clean, smooth, and structurally sound before laying the tiles. Remove any existing flooring or wall covering and repair any imperfections. 2. Layout: Plan the layout of the tiles to ensure a balanced and aesthetically pleasing design. Start from the center of the room or wall and work outward, adjusting the layout as needed to avoid small cuts at the edges. 3. Adhesive Application: Apply a thin layer of mortar or adhesive to the subfloor or wall using a trowel. Work in small sections to prevent the adhesive from drying before laying the tiles. 4. Tile Placement: Carefully place each tile in the adhesive, ensuring proper spacing and alignment with neighboring tiles. Use spacers to maintain consistent grout lines.


Your comment submitted.