Glazed tiles are a popular choice for homeowners and designers alike, thanks to their versatility, durability, and aesthetic appeal. Whether you’re looking to spruce up your kitchen, bathroom, or any other space in your home, glazed tiles offer a wide range of options to suit your style and needs. In this comprehensive guide, we’ll explore everything you need to know about glazed tiles – from their manufacturing process and types to their benefits, installation, and maintenance.
.
 Let’s dive in! What are Glazed Tiles? Glazed tiles are ceramic or porcelain tiles that have been coated with a glass-like glaze that is fused to the surface of the tile through a high-temperature firing process. This glaze not only adds a decorative finish to the tile but also provides a protective barrier that makes the tile resistant to water, stains, and scratches. The glaze can be applied in a variety of colors and finishes, allowing for endless design possibilities. Types of Glazed Tiles: There are several types of glazed tiles available on the market, each offering unique features and benefits. Some of the most common types include: 1. Ceramic Glazed Tiles: These tiles are made from clay that is fired at high temperatures and then coated with a glaze. Ceramic glazed tiles are available in a wide range of colors, patterns, and sizes, making them a versatile choice for various applications. 2. Porcelain Glazed Tiles: Porcelain tiles are denser and more durable than ceramic tiles, making them ideal for high-traffic areas such as kitchens and bathrooms. Porcelain glazed tiles are also available in a variety of designs and finishes, including matte, semi-gloss, and high-gloss.
..
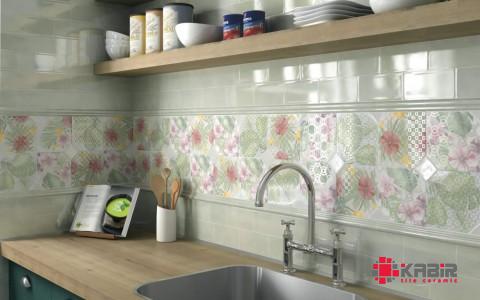 3. Terracotta Glazed Tiles: Terracotta tiles are made from natural clay and have a distinctive rustic appearance. When glazed, terracotta tiles offer the best of both worlds – the warmth and character of natural clay combined with the durability and stain resistance of a glazed finish. Benefits of Glazed Tiles: Glazed tiles offer a wide range of benefits that make them a popular choice for both residential and commercial spaces. Some of the key benefits of glazed tiles include: 1. Durability: The glaze on glazed tiles creates a hard, protective barrier that helps the tiles resist scratches, stains, and moisture damage, making them a durable and long-lasting flooring option. 2. Easy Maintenance: Glazed tiles are easy to clean and maintain, requiring only regular sweeping and mopping to keep them looking new. The glaze prevents dirt, grime, and spills from penetrating the tile surface, making cleanup a breeze. 3. Versatility: Glazed tiles come in a wide range of colors, patterns, and sizes, allowing for endless design possibilities. Whether you prefer a sleek, modern look or a more traditional aesthetic, there is a glazed tile to suit your style.
…
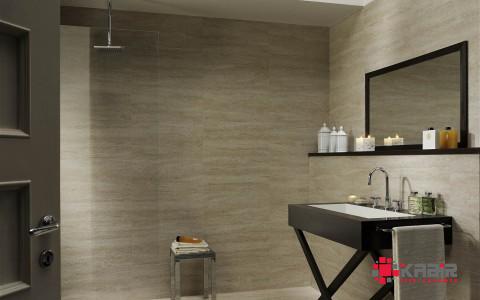
 4. Water Resistance: The waterproof glaze on glazed tiles makes them an ideal choice for wet areas such as bathrooms, kitchens, and mudrooms. The glaze prevents water from seeping into the tile, reducing the risk of water damage and mold growth. Installation of Glazed Tiles: Installing glazed tiles is a straightforward process that can be done by DIY enthusiasts or professional installers. Here are the basic steps involved in installing glazed tiles: 1. Preparation: Before you begin, ensure that the subfloor is clean, dry, and level. Remove any existing flooring, such as carpet or vinyl, and repair any cracks or imperfections in the subfloor. 2. Layout: Plan the layout of the tiles, taking into account any patterns or designs you wish to create. Start in the center of the room and work your way outwards, using spacers to maintain even grout lines. 3. Cutting Tiles: Use a tile cutter to cut tiles to fit around obstacles such as cabinets, doorways, and corners. Measure twice and cut once to ensure a precise fit. 4. Adhesive Application: Apply a thin layer of tile adhesive to the subfloor using a notched trowel. Press the tiles into the adhesive, making sure to maintain consistent spacing between each tile. 5. Grouting: Once the adhesive has dried, fill the gaps between the tiles with grout using a grout float. Wipe away any excess grout with a damp sponge, taking care not to disturb the grout lines.


Your comment submitted.