Installation of different types of tiles such as porcelain, ceramic, or terrazzo can give a beautiful look to your home. In egypt, these tiles are available as most of them are imported from other countries. If you’ve never done tile projects before, you might be surprised at the many types of tiles available.
Ceramic bricks and porcelain bricks are the most commonly used, but there are also glass bricks, cement bricks, metal bricks, and stone bricks – only a few cases. What is more complicated is that not every type of tile is suitable for every job. Of course, you also have to consider budgets. It’s hard to feel a little overwhelmed, that’s why we work hard.
Whether you’re buying a real-time project or planning for the future, we all hire experts to guide you through understanding the 12 most common floor tiles and wall tiles.

Find the most suitable tiles for every type of home project to ensure you fall in love with your makeover over the next few years. They are considered to be the main elements that provide the internal and external decoration of the building and add an amazing and elegant touch to your home.
A good investment, floor tiles will always increase your value and keep it in the best condition after laying. Tiles are made of a variety of materials, such as clay, stones, metals, waterworks, and quartz.
Different types of tiles used in building construction are described below: Let’s face it – when it comes to our houses, the accent is put on the walls, furniture, and general aspect. The choice of floor covering is often just a reflection afterward.
However, the floor covering you choose greatly helps to improve the appearance of your home. Although there are no options, tiles are often considered the best choice in terms of appearance, maintenance, and the number of patterns and patterns available.
ceramic tile:
The ceramic tiles are made up of sand, natural products, and clay. Once molded in the desired form, they are taken from the oven. There are two types of ceramic tiles:
Glazed ceramic tiles: During the cooking process, additional glass is added to the tiles. These are less dense, less non-slip and scratch subjects than tiles not covered. However, they are available in a variety of colors, and finishes and are resistant to stains.
Unglazed ceramic: these tiles are dense, have a natural earthy color, and are non-slip. However, they are sensitive to stains and require a sealer to protect them.
The ceramic tiles are very durable and easy to maintain. In terms of hygiene, these types of tiles do not attract pollen, dust, or dirt and can be cleaned with a simple mop or sponge. A disadvantage is that these tiles are hard and do not heat well.
Porcelain tile:
The tiles are similar to ceramic tiles but more solid, harder, and waterproof. Due to their sustainability and water resistance, these tiles are widely used in bathrooms and toilets.
These types of tiles are also available in a variety of colors and patterns. The tiles are resistant to spots, especially when they are enameled, and can be cleaned with a balanced pH solution of liquid soap and water.
they are resistant to fire and very durable if they are well used. These types of tiles are generally resistant to cracking, and even if they are cracking, disfigured tiles can be removed and replaced.
Glass tiles:
Vitrified tiles are types of non-porous ceramic tiles made from a mixture of clay, silica, quartz, and feldspar. These types of tiles are often used to replace marble and granite floors and are available in a variety of colors. There are four categories of these tiles, depending on the manufacturing process:
Double load vitrified tiles: in this process, two colors are introduced into the machine, which gives a very thick two-color pattern on the tile. The color and design of this layer have a thickness of about 3 to 4 mm.
Full mass vitrified tile: In this method, the scratches on the tiles become invisible because the tiles are uniform and colorful.
Vitrified tiles with soluble salt: In these types of tiles, soluble salts are used to enter the vitrified tiles and give color, and design, and create patterns on the tiles.
Glazed vitrified tile: glazed glass tiles are tiles made with a layer of liquid glass.
Vitrified tiles can be used for interior and exterior applications. They have a coherent design and pattern and are easy to place and maintain. These types of tiles are also resistant to scratches and stains.
These tiles must be handled with care because they tend to flare in the corners. They are also more expensive at Rs. 185 rupees. 280 lb/pi2, on AVG. Compared to ceramic tiles.
Terrazzo tiles:
The terrazzo is a traditionally created floor covering material by exposing marble bursts on a concrete surface, then polishing it until smooth. Now available in the form of a tile. Due to their unique design, these tiles have a personalized appearance. They are easy to clean because they do not easily absorb liquids.
It can withstand any type of use for a long time. It is one of the most expensive floor coverings on the market. These tiles are resistant and do a great job to keep them heated. The installation is also difficult and requires the whole team.
Cement tile:
Cement bricks are environmentally friendly as they are made of natural materials and natural pigments. They can fit any size part and allow for more functions including incision and embedding, pressing patterns, etc. They also have thousands of colors to choose from.
These types of tiles can be customized to fit any budget and are durable. They are quite humid. However, they should be sealed regularly to prevent staining. They are also very heavy and they need support when installed on the wall.
Stone tiles:
Stone tiles such as marble and granite can make the house look stunning. However, natural stone has different degrees of absorption, and granite is almost waterproof, even if the sealant is not used.
Different grades (1,2 and 3) determine the quality, and grade 1 is the highest, which indicates the use of high-quality and uniform materials. Stone tiles have a simple appearance and aesthetic appeal. However, marble is easy to scratch.
Some materials are also crispy. That’s all the content of the tiles! We hope you have a good idea of which type of tiles is most suitable for your home.
Porcelain tiles for home installation
The type of tile is one of the factors that must be considered for home installation. Mostly porcelain tiles are the first choice for this purpose.
Installing tile can be a very rewarding project that can increase your home’s resale value while adding aesthetics and durability. With proper preparation and step-by-step guidance, you can do it yourself.
Step 1: Make sure you have all the tools and materials
Tools –
- Pencil
- Tape measure
- Level
- Speed square
- Notched trowel
- Rubber float
- Grout sponge
- Tile spacers
- Power drill
- Mixing paddle
- 5-gallon buckets
- Knee pads
- Safety glasses and earplugs
- Scoring cutter or wet saw
- Handsaw or jamb saw
Materials –
- Tile
- Thinset mortar
- Cement backer board
- Cement board screws
- Grout
Step 2: Prepare the surface
Be sure to remove any old flooring. Surfaces should be clean, smooth, and dry for best results. Repair, correct, and level any damaged or uneven areas.
Double check to make sure the surface is architecturally sound and can support the weight of the tiled floor. Remove any moldings, trim, or fixtures that might interfere with the installation, and inspect the door frame to make sure you have enough clearance to lay the tile.
For an effective tiling experience, start by marking the center point of each wall in the room. Next, trace the center of the room with a chalk line between the center points of the opposite walls. The intersection of these lines should form a perfect square.
Starting at the center point, lay a row of loose tiles in both directions along the center line, using tile spacers for an even, even seam. Laying out the tiles ahead of time helps ensure the look doesn’t repeat itself and ensures there are enough tiles to complete the project before you start. Once you get to the wall you will probably need to cut the tile to fit.
If the cut you want is less than half the tile, you can adjust the center line by adjusting the new line to half the size of the tile closer to the wall.
This will help ensure your designs look uniform and professional. If necessary, repeat this step along the intersecting axes.
For larger rooms, you can simplify the job by cutting extra lines parallel to the center line to divide each section into a smaller 2′ x 3′ grid.
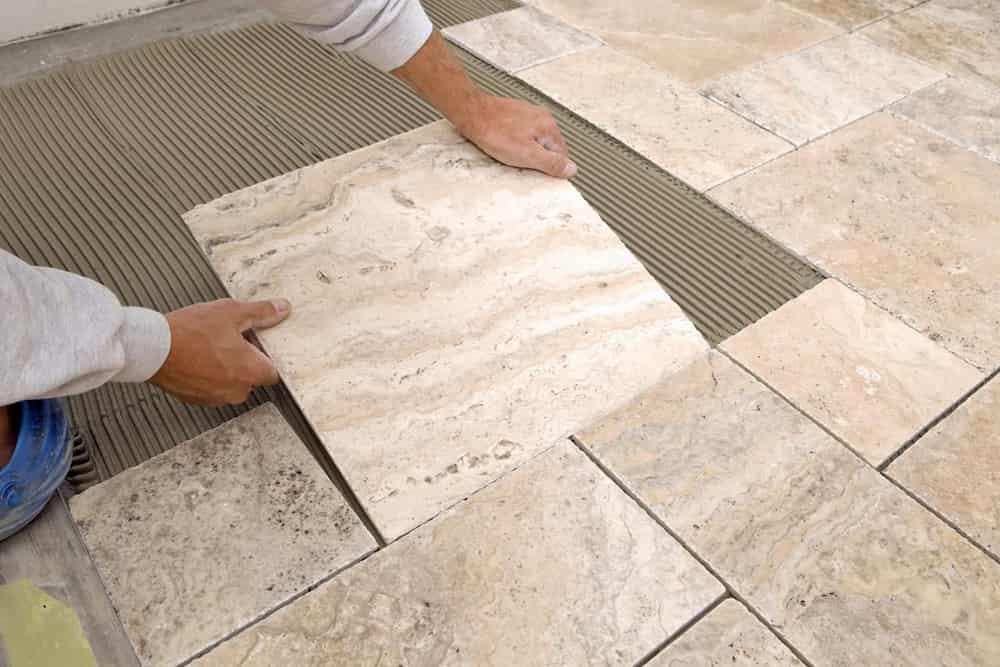
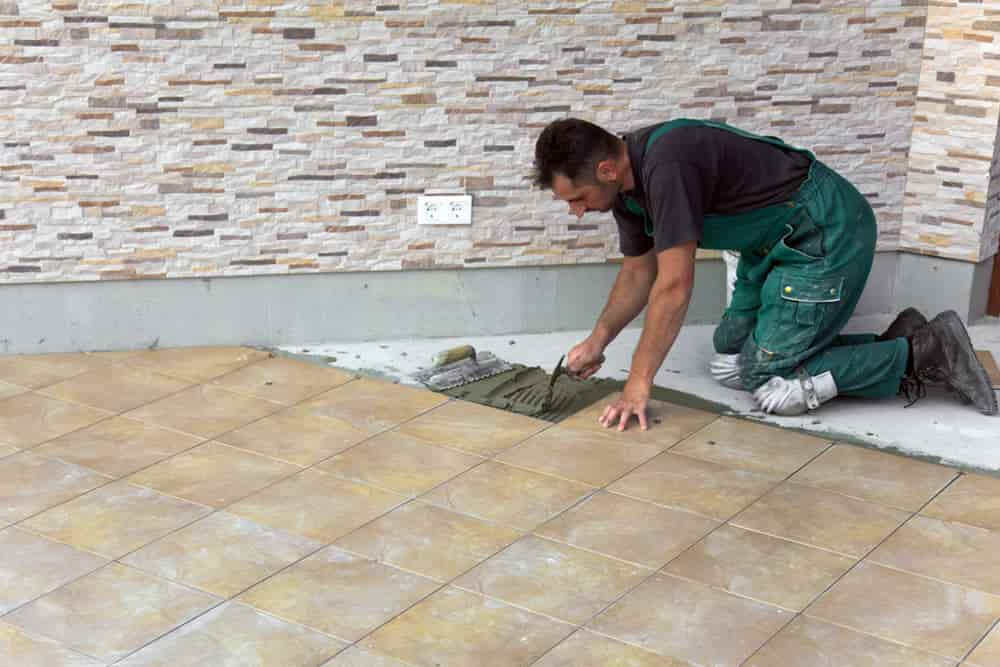
Step 3: Apply the adhesive
Always mix just enough adhesive to use within 30 minutes, you don’t want the adhesive to start to harden before application.

Using the flat surface of the trowel (as recommended on the adhesive package), apply a 1/4 inch coat to the surface of a gridded area without covering the guides. Next, hold the trowel at a 45 degree angle and use the notched side to comb the adhesive in streaks.
When you remove the excess adhesive, you end up with an even, ridged fixed bed for your tile. Do not apply glue to the area for more than 15 minutes within 15 minutes.
Step 4: Cut
Start by marking any cuts on the surface of the tile with a pencil or marker. You’ll be able utilize a tile cutter for straight or corner to corner cuts. You can make a curved cut with pliers, cutting small pieces for the best results. For any curved cut along the entire length, a bandsaw can be used. After cutting, smooth any sharp edges with emery to soften the edges of the tile.
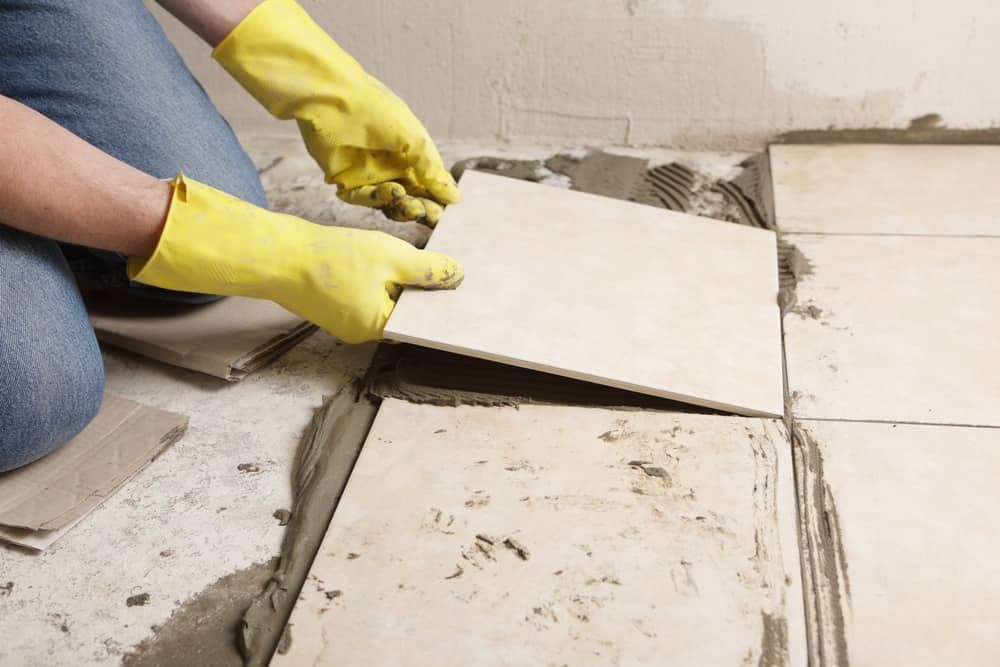
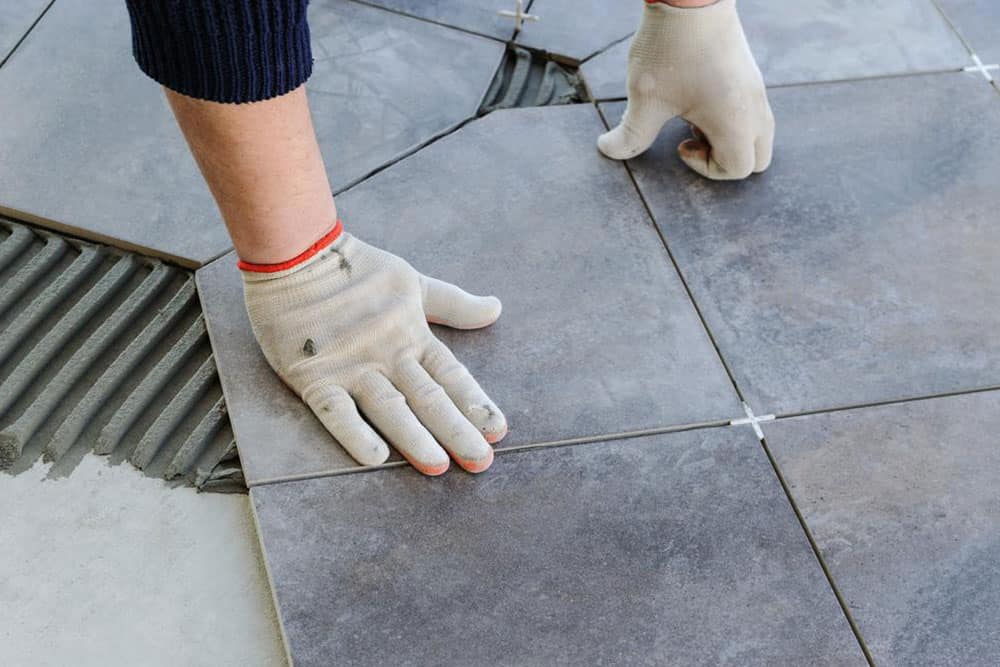
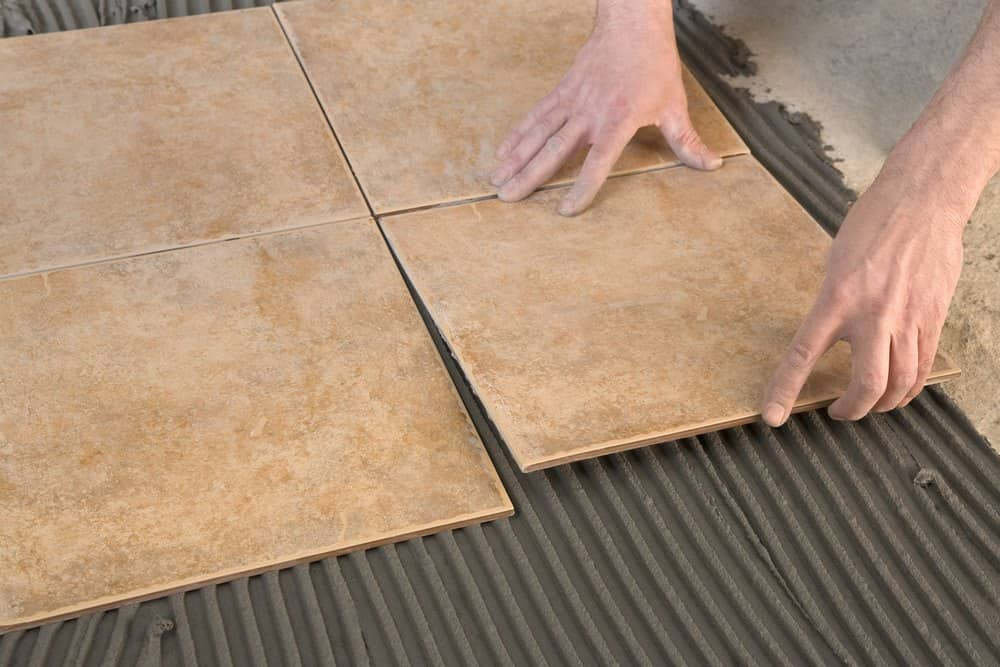
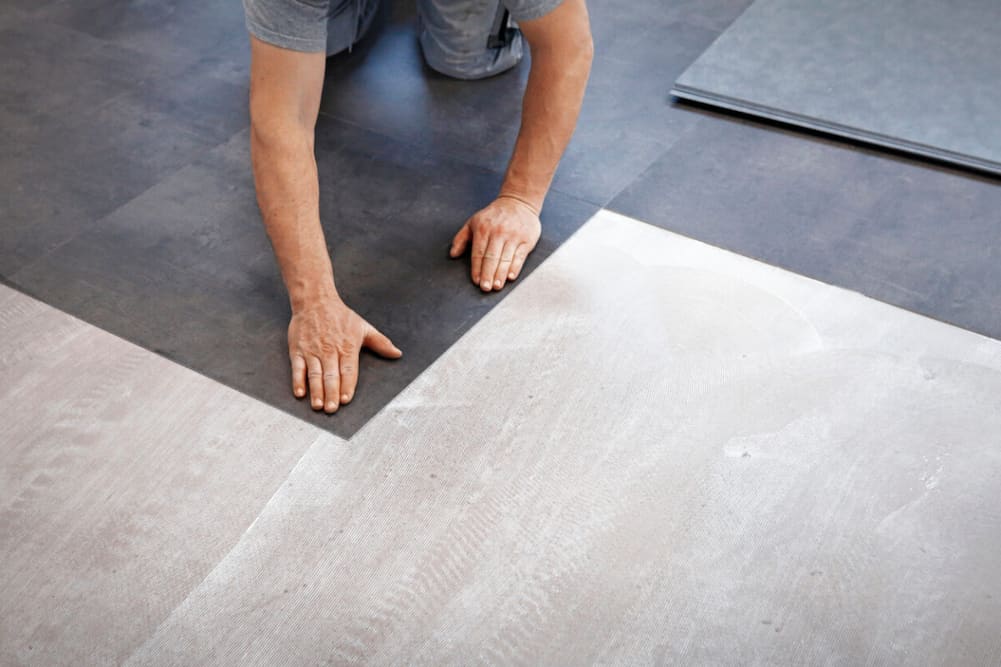
Step 5: Configure tiles
Start by installing the tiles in the center of the room, one grid at a time, completing each grid before moving on to the next. This will help keep the installation balanced and even.
In each grid, it’s best to start with the first tile in the corner and work outward. Using a slight twisting motion, place one tile at a time, avoiding sliding them into place.
Be careful not to let the edges of the tiles collide. Be sure to insert spacers or leave equal joints between tiles when laying each tile. Finally, register the perimeter tiles in each grid, leaving enough space between the tiles and the wall.
Once a single grate is fully installed, tap all tiles with a rubber mallet or hammer and wood block to ensure a solid bond and flat surface.
Use a putty knife to remove excess adhesive from joints and use a damp sponge to remove excess adhesive from tiles to avoid the uneven appearance and leave a clean space for grout. Let the tiles sit for at least 24 hours before walking on them.
Step 6: Grouting
After reading and following all instructions and precautions on the grouting package, use it for 30 minutes each time to ensure it doesn’t dry out before it can be used. When removing the tile pads and applying the grout to the tile surface, use the floating rubber grout or scraper to press it into the grout. Tilt the floats 45 degrees and use the edge of the float to immediately remove excess grout from the surface.
Don’t let the grout have time to dry. Then tilt the floats 90 degrees and scrape them along the diagonal. Leave the grout static for about 15-20 minutes, then clean off any residue on the surface with a damp sponge and make the grout seam smooth.
Make sure the sponge is washed often and replaced as needed. When the cement slurry is dry and cloudy on the surface of the tile, it is brightened with a soft cloth. If necessary, use a damp sponge and water to rinse again.
New grouting flooring should be cured for approximately 72 hours before use, and it should be at least three weeks before using a seal or polish.


Your comment submitted.