In the realm of interior design, the choice of flooring plays a significant role in defining the ambiance and aesthetic appeal of a space. Among the myriad options available, 9×12 white ceramic tiles stand out for their timeless elegance, versatility, and durability. Whether you are looking to revamp your kitchen, bathroom, or any other area in your home or commercial space, these tiles offer a perfect blend of style and functionality. In this comprehensive guide, we will delve into the world of 9×12 white ceramic tiles, exploring their benefits, installation methods, maintenance tips, and design inspirations. Benefits of 9×12 White Ceramic Tiles: 1. Elegance and Timeless Appeal: One of the primary reasons why 9×12 white ceramic tiles are a popular choice among homeowners and interior designers is their timeless elegance.

.
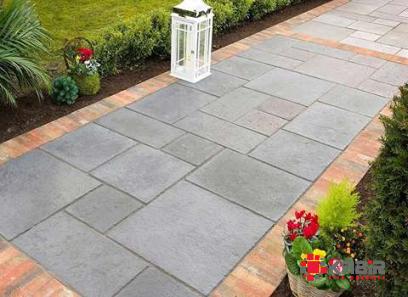
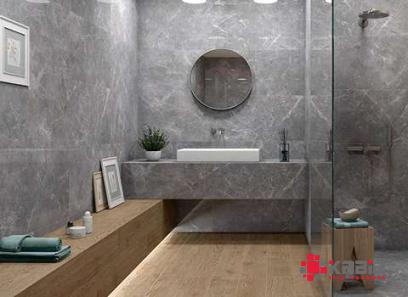 The pristine white color exudes a sense of sophistication and purity, making it a versatile option that complements a wide range of design styles. Whether you prefer a minimalist, contemporary, or traditional aesthetic, white ceramic tiles can seamlessly integrate into any setting, adding a touch of refinement to the space. 2. Versatility in Design: White ceramic tiles serve as a blank canvas that allows you to unleash your creativity and experiment with various design possibilities. From creating a sleek monochromatic look to incorporating intricate patterns and textures, these tiles offer limitless opportunities for customization. Whether you opt for a classic subway layout, herringbone pattern, or geometric design, white ceramic tiles can elevate the visual appeal of any room and make a bold design statement. 3. Durability and Longevity: In addition to their aesthetic appeal, 9×12 white ceramic tiles are renowned for their durability and resilience. Ceramic tiles are inherently resistant to moisture, stains, and scratches, making them an ideal choice for high-traffic areas such as kitchens, bathrooms, and entryways. Unlike other flooring options, ceramic tiles do not warp, fade, or deteriorate over time, ensuring that your investment will stand the test of time and maintain its beauty for years to come.
..
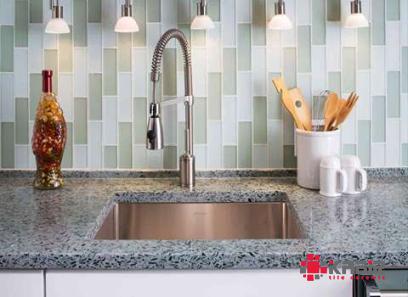 4. Easy Maintenance: Maintaining white ceramic tiles is a breeze, thanks to their non-porous surface that repels dirt, grime, and spills. Routine cleaning with a mild detergent and water is all it takes to keep your tiles looking pristine and sanitary. Unlike natural stone or wood flooring that require specialized cleaners and sealants, ceramic tiles offer a low-maintenance solution that is perfect for busy households and commercial spaces. Installation Methods for 9×12 White Ceramic Tiles: When it comes to installing 9×12 white ceramic tiles, there are several methods to choose from, depending on the specific requirements of your project. Whether you are a seasoned DIY enthusiast or prefer to hire a professional contractor, the following installation techniques can help you achieve a flawless and long-lasting result: 1. Thinset Mortar: Thinset mortar is a versatile adhesive that is commonly used for installing ceramic tiles on floors, walls, and countertops. To begin the installation process, mix the thinset mortar according to the manufacturer’s instructions and apply a uniform layer to the substrate using a trowel.
…
 Place the tiles firmly into the mortar, ensuring proper spacing between each tile, and use tile spacers to maintain consistent grout lines. Allow the mortar to cure before grouting the tiles to complete the installation. 2. Snap/Cut Method: The snap/cut method is a practical approach for cutting and installing ceramic tiles with precision and accuracy. To use this method, mark the desired cutting line on the tile surface using a pencil or tile marker. Place the tile on a tile cutter or wet saw, aligning the cutting line with the blade, and gently score the tile along the marked line. Apply pressure to the tile cutter’s handle to snap the tile cleanly along the scored line, resulting in a clean and precise cut. Repeat the process for any additional cuts needed to fit the tiles into the designated space. 3. Grouting and Sealing: Once the ceramic tiles are securely installed, the next step is to grout the joints to provide a seamless and uniform finish. Mix the grout to a smooth consistency and apply it to the tile joints using a rubber float, ensuring that the grout fills the spaces completely. Use a grout float to remove excess grout from the tile surface and smooth the joints for a uniform appearance. Allow the grout to set for the recommended time before wiping off any haze with a damp sponge. To protect the grout from stains and moisture, apply a quality grout sealer according to the manufacturer’s instructions.


Your comment submitted.